Sunday, February 28, 2010

Hands on Bible - Review

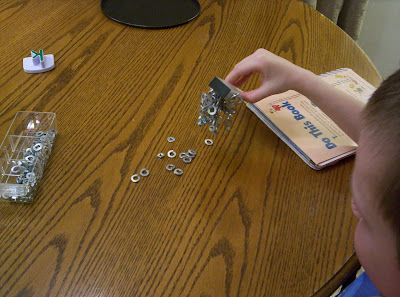
Sunday seems like a good day to review a new Bible I picked up to use for family devotions. It's called the Hands on Bible, by Group Publishing, because it includes over 102 hands on, science and craft activities, as object lessons to go along with the scripture.

Here are a few of the other features of this Bible, that I'm really happy about:

  • exciting, kid friendly introductions to each book, that pump you up, and draw you into the book.

  • Timelines, that set the events in history, beside secular events...for instance, did you know that Haggai was prophesying at the same time public libraries were being opened in Greece, and five years after polo became a sport in Persia?

  • 52 key verse activities, help you remember important verses.

  • Fun, punchy, Bible hero biographies

  • Charts for everything from types of sacrifices, to a comparison between Genesis and Revelation

  • A family devotion section, with over 100 lessons to work through as a family, tying into scripture, and the hands on activities.

There's more, too. I'm actually really thrilled with the entire thing (except maybe some of the big head, pop-eyed photos, modern publishers seem to think kids like). It's really the best Bible I've seen for pre-teen children, and it's in the New Living Translation, which makes it easy for children to read. But don't take my word for it, you can download a sample of it (the entire book of Genesis!), for free from the publisher. You won't see the pretty color pages that way, but it will give you a look at the style.

I was worried, that all the extras scattered throughout, might be a distraction when trying to read the actual text, but I took it with me to church today, for a trial run, and found it was as easy to read as my normal "grown-up" study Bible. I'm really excited to begin using it in our daily study.

It's great to be a homeschooler.

Playing With Magnets - Physics for Kids


Okay, this particular Science Sunday post started out as a chemistry post, entitled "Finding Elements Around The House - Iron In Your Food", or something like that - I actually didn't even make it as far as the title.

While the kids were getting ready for bed last night, with their heads and tummies full from our chemistry "lesson", I decided to test out the experiment I had planned for today. It's a Vickie Cobb experiment, from one of her science books for kids, I don't actually remember which one. But, it was a Vickie Cobb experiment we tried, and failed at, last week, so I decided I better try this one out ahead of time.

According to Cobb, you can remove tiny bits of iron, from cream of wheat cereal, with a magnet. First, you put the cereal into a baggie, and crush it, finer than normal Cream of Wheat. Then, you place the magnet in the bag. Once you remove the magnet, there should be tiny black specks on it, which are actually iron, removed from the cereal. There won't be many, and they'll be hard to see, but they can be brushed off onto a white sheet of paper, and observed.

Naturally, we didn't have any Cream of Wheat. So, I decided to give Rice Krispies a try. But, sadly, no mater how finely I crushed the cereal, I couldn't pull any iron out - even with a rare earth magnet. Of course, while I had the rare earth magnet out, I had to play with it, sticking it to everything in site, testing my pots and pans, building stacks of nuts and washers.

It was about that time, that I was spotted by my seven year old. I'm sure you can imagine where things went from there.

He had a great time playing with the magnet, though I switched him over to one that was easier to handle. Those rare earth magnets are scary strong - I pinched my finger pretty good between two of them, when they attracted each other, while I was putting mine away. The magnet I left my son with was just as strong, but encased in a plastic handle.


He tested it against the magnets from our fridge.


He discovered he could turn a scissor blade into a magnet.


I tried to show him that the magnets would repel each other, and started to tell him about magnetic poles, but he informed me he just wanted to play. I couldn't really blame him, as he was still digesting a pretty in depth chemistry lesson.

It wasn't long before he was mobbed by the other children, and more magnets had to be brought out.


I snuck off in search of our copy of Mickey's Magnet by Franklyn M. Branley. It's an adorable story, about a little boy, who spills his mother's straight pins, and is given a magnet to pick them up. It's also a sneaky way to turn a bed time story into a physics lesson. Branley, who died in 2002, was the author of over 150 science books for children. I'm not wild about all of them, but this one is terrific.

Unfortunately, the last time I came across the book, I put it aside in a special place, so I'd have it easily accessible if we happened into a quick lesson on magnetism. In other words, I may never find it again. So for one night the kids were off the hook - but they were experimenting and learning quite a bit on their own.

Clearly, I'll be spending my Sunday afternoon pulling the house appart. But, just in case, I have Branley's book on hold now at the library too, and I located a companion lesson online, aimed at grades K-2.

For more children's science fun, check out this week's Science Sunday link up, at a Mommy's Adventures.

It's great to be a homeschooler.

Saturday, February 27, 2010

Introducing Children to the Periodic Table of Elements


We've been doing a lot of kitchen chemistry lately, and I thought it was time to ground things a bit, with a review of (and introduction to, for the younger children) the periodic table of elements. We have the level 1 and 2 Chemistry books from Real Science-4-Kids. It's an excellent series, and both books provide a very nice explanation of the table, geared to children. And, the level two book even comes with a pull out poster to hang on the wall, just like in a real chemistry classroom.

But we notched up the fun today, with Simon Basher and Adrian Dingle's The Periodic Table, Elements With Style. It's a quirky little reference book, that gives real personality to the elements, both through the oddly intriguing illustrations, and the offbeat narrative. Each of the more common elements is allowed to tell it's own story, describing for the reader, the sort of element it is.
Each chapter begins with a description of one group of the table. For instance, Chapter One - The Alkali Metals, starts out:
"A rowdy bunch of rebels, these elements have a reputation for extremely reactive behavior."
While, within the chapter each element tells it's story. Like lithium, who says, among other things,
"I am generally a useful and very helpful character. You can find me acting as the positive half of many batteries, and as part of high-performance, industrial lubricants."
Most of the dialogue will go over young children's heads, but it is a nice way to introduce the concept of the elements, with the hows and whys of their groupings on the table.
I also found a very fun activity idea at Not So Humble Pie - the periodic table of cookies!

And, it's not as insane as it sounds. Really, if the cookies are made small, about 1 inch, by 1 and 1/2 inches, it only takes one batch of sugar cookie dough.


I had the children do the base frosting, and used it as a chance to discuss how Mendeleev divided up the elements.


The only draw back to small cookies, is there isn't room to pipe on the atomic weight, or number. I tried to fit the numbers on to begin with, but it became clear, pretty quickly, it wasn't going to work. So, we'll have to settle for the symbols.

Now, as we eat our snack tonight, we can flip through Basher and Dingle's book, and discuss the elements the children are eating. And, when a few elements have been removed, and eaten, we can look at how the Mendeleev's table, was helpful for identifying the missing elements.

It's great to be a homeschooler.

Friday, February 26, 2010

What My Child is Reading - February 27, 2010


This week we read:

Sun Bread by Elisa Kleven, a fanciful, rhyming story, with a recipe for bringing sunshine to a gloomy day. Click, here, for more on the book, and the bread.


On Purim by Cathy Goldberg Fishman, explaining the symbols, and traditions of Purim, which we read for our stART project.


The Mystery Bear, a Purim Story by Leone Adelson, a super cute story of a bear cub, who wakes up early from his hibernation, and sneaks out of his den in search of a snack. He finds himself invited into a Purim celebration, where he is complemented on his costume, and given honey, and poppy seed snacks, until the Purimspiel begins, and it is discovered, that he's not wearing a costume at all! It's a sweet story, but the bear, is a real bear, and while it's fuzzy, and teddy bear like on most of the pages, it does look angry, and a little frightening, at one point.
One Nation, America by the Numbers, and A is for America, An American Alphabet by Devin Scillian. Both are put out by Sleeping Bear Press, and are very much like the state books we've been reading, by that publisher, except encompassing America as a whole. Just like the state books, they have a few short sentences about an American attribute, good for younger children, with a couple of paragraphs of expanded explanation to the side, for older children, and adults.


Finally, today we're reading The Periodic Table, Elements With Style!, but I won't tell you about it, yet. I'm hoping to give it it's own post, later today. But, first we're working on some cookies to go with it.


All of the book cover images above, were borrowed from the Montana public libraries' shared catalogue.

For more reviews and recommendation of children's literature, click over to this week's What My Child is Reading link up, at Mouse Grows, Mouse Learns.

It's great to be a homeschooler.

Honest Scrap Award

Julie over at My Book Retreat very sweetly gave me the Honest Scrap Award.


The rule of the award is to share 10 honest things about yourself. So...

  1. As a whole I don't care for Dr. Seuss books. This is something I just realized, while thinking about whether to do a project with the children, to mark the author's birthday.
  2. I love to bake goodies, but I'm not crazy about cooking, you know, regular food. I do cook, because the children have to be fed more than cookies, but I don't enjoy it. Happily for me though, the man of the house loves to cook, and takes over dinner duty quite often.
  3. It's now been about two weeks since I've had a cup of coffee. I was finding my two pot a day habit was making me a little edgy, and irritable - not the best thing with six children, in my care of.
  4. I am extremely non-photogenic, and I have the pictures to prove it - but you won't see them here :)
  5. I have never ridden on a roller coaster, but I have been to Disney World.
  6. Personality wise, I can totally identify with Walter Mitty.
  7. I'm a cat person, which is sad, as I live in a state known as a dog state. Which is just as well, because with a decade of diaper duty behind me, the last thing I want is a litter box.
  8. Every year I homeschool, I edge closer to the unschooling philosophy.
  9. I have a frizzy curl to my hair, that puts the members of the 80's hair bands to shame.
  10. William Shatner makes me smile.

Whew, if that's not a strange hodge-podge of information, then I don't know what is! And, what an awful lot of I, I , I's!

So, how about making it your turn. Feel like sharing? Here's the deal - there doesn't seem to be anything in the rules about passing this award on, but I thought maybe I would - sort of. If you've read this far, I have to assume you are a regular reader. As such, I'm curious to know more about you, too. One of the things I've really enjoyed about blogging, is getting to know other mom-bloggers.

So, if you want, snatch the award above (just left click, save it as a picture to your computer, and then add it as an image to your post), and then leave me a comment to let me know you did, so I can visit your blog, and learn more about you, too.

Don't have a blog? How about just writing your 10 things in the comments - just keep 'em nice please, this is a family blog, after all!

As always, it's great to be a homeschooler.

Fabric Scrap Fashions - A Quick Boredom Buster Craft


I saw this craft at Made By Joel , and decided it to would be fun to try with the girls, today.

I cut a few little skirts, jeans, and dresses out of scrap fabric...


... for the girls to glue to paper...


...and draw people into.


Quick, easy, and fun!


It's great to be a homeschooler.

Thursday, February 25, 2010

Sun Bread

This is such a funny, restless time of year. Our winter has been relatively mild, and short, but even so, now that we're nearing March, we're ready to be done with it. Every beautiful, sunshiny day makes us just that much more anxious for spring. And, every cloudy, rainy, or snowy day seems gloomy, and unwelcome.

Thanks to Little Page Turners, we found a book, that addresses this time of year perfectly - Elisa Kleven's Sun Bread. In a little town, where winter just seems to be hanging on, while children are grumbling in their homes, and everyone is wishing the sun would show it's face again, one baker decides,

"Because the real sun likes to hide, I'll make my own small sun inside."

The town's people celebrate "the joy good bread can bring", and forget to be miserable. When the sun reappears, for a taste of the bread, so much the better. But, in the meantime, on the gray days, the people, or in this case, animals, of the town keep busy making sunshine of their own.

And, in case you're having some restless gray days too, there's a recipe on the back of the book, with step by step instructions, for making the sun bread.

Mix three bowls (I'm giving away the recipe, but the publisher is allowing it to be viewed on Amazon, so I don't think it's a state secret, and besides which, it's so much better with the book):

  • one with 3 eggs, and three tablespoons of sugar,
  • one with 2 cups of flour (bread flour if you have it), and 1 stick of melted butter,
  • and one with 2 packages of active dry yeast, proofed in 3 tablespoons of lukewarm milk.

Combine the bowls together, and kneed the dough for ten minutes.


Place the dough in a greased bowl, cover, and let it rise, in a warm place until double (about 1 hour).


Punch it down. This was my seven year old's favorite part, but sadly, I didn't get a picture of him doing it!

Kneed the dough a few more times, and shape it, on a greased cookie sheet, into a sun shape, using half the dough for the face, and the other half for the corona. Use your fingers, or the greased handle of a wooden spoon, to make deep eye, and mouth holes, and finish the face off with a small, dough ball nose.


Cover the dough, and let it rise for another hour, then bake it for 20 minutes at 425 degrees Fahrenheit.


If the bread looks like it is browning too quickly, you might want to cover it with a piece of tinfoil for the last 15 minutes of baking. Despite how it looks, test it by inserting a tooth pick in the middle. If it comes out clean, the bread is done. It's a very light, fluffy, sweet bread.


And, served warm, with slices of apple, and cheese, and honey, jam, or butter, it makes for a very cheery lunch, or story time snack.


It's great to be a homeschooler.

Wednesday, February 24, 2010

On Purim - Story and Craft

We read Cathy Goldberg Fishman's On Purim, for our stART (story + art) project this week. As you might guess from the title, this story is about the Jewish celebration of Purim, as seen through the eyes of a little girl, preparing to celebrate with her family. It explains how many of the modern traditions, are tied into the history of the holiday, and introduces the outsider to the story of Esther.

We learned about things like Adar (the sixth month of the Hebrew calendar), groggers (handheld noisemakers used to blot out the sound of the name Haman, the villain of Purim), hamantaschen (tasty cookies, given as gifts during Purim), megillah (a parchment scroll, with the story of Esther), nosh (Yiddish for eat), shalach manot (sending gifts to friends and the poor), and tzedaka (money given to help the poor). Happily there is a glossary, with a pronunciation guide, at the back of the book.

We were especially taken by the idea of people shaking noisemakers, and booing, every time the name of the story's villain was mentioned, so we incorporated that into our craft project.

I printed a puppet template of five of the Purim characters, Vashti, Esther, King Ahesuerus, Mordecai, and Haman (boo!), on card stock. The girls colored them with colored pencils...


...and then cut them out (with my help)...


...and glued them to craft sticks.


We tied a ribbons with a couple of bells, to the sticks of the Haman puppets, before the girls glued their Hamans on, as a built in grogger, of sorts.


Then, the little ones headed off, to act out the story of Esther (or their version of the story, anyway)...

...while their older sister colored in an Esther of her own...


...to add to our history timeline.


For more childrens story stretching arts and crafts, check out this week's stART link up, at a Mommy's Adventures.


It's great to be a homeschooler

Cooked Play Dough Update


We've been playing with our homemade play dough for a week now, and its texture is holding up very nicely - not a bit of sliminess. In fact, I did some research, and found, that this play dough will keep, up to three months.

The texture is firm, and tiny bit rubbery, very much like what you might buy at the store. I would definitely recommend it over the uncooked, salt type of play dough.


Click, here, to go back to last week's post, with for recipe.

And, as for tips:

  • Cook the dough on the stove, rather than in the microwave, to avoid dry spots.
  • Cooking intensifies the colors, so for really bright, beautiful color, add the food coloring to dough before you cook it.
  • If you plan on making several batches, find a bulk source for the cream of tarter, and food coloring, to reduce the cost.
  • Store the dough in Ziploc bags, or airtight containers, at room temperature.
  • If it starts to dry out, a small amount of water can be kneaded in, to restore the texture, as long as it's not too dry.

It's great to be a homeschooler.