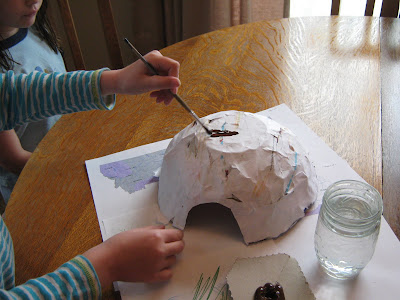
 After reading The Magic School Bus Sleeps for the Winter, the older girls were inspired to make a hibernation diorama, sort of like one pictured in the book.
It's a Scholastic Level 2 Reader, one I actually picked up to read with the younger children, but as usual, it's chocked full of informative side facts, about all kinds of animals in the winter, that makes it interesting enough for the entire family.
The girls started out by turning a mixing bowl upside down, and covering it with tinfoil.

Then, they layered on newspaper strips, dipped in watered down glue. Or, at least A (age 9) did. G, distracted by the prospect of tinfoil jewelry, lost interest in the project.

A, followed through though, and once the newspaper had dried overnight, she added a layer of white, scrap paper strips, again dipped in watered down glue.

The next day, she removed the "cave" from the mixing bowl, peeled away the tinfoil...

...cut a door, and painted the cave with brown, acrylic paint.

When the paint was dry, she glued the cave to a large piece of cardboard. Then, she went to work forming a bear out of Crayola Air-Dry Clay.

With the bear safely in place, in the cave, she covered the cardboard outside the cave with glue from a glue stick...

...and sprinkled on leaves, cut from tissue paper.

Then, she glued on "snow" - the cotton, and polymer powder, ripped from the inside of a diaper (I knew there was a reason we didn't throw away the last few left in the package, when we finished potty training). I had planned to give her cotton balls to use, but then I remembered we had destroyed all of the cotton balls, playing with our tape spider web.

For a finishing touch, she added some toothpick twigs on the ground, and taped on a couple of pipe cleaner trees.
For a simpler hibernation craft, check out our paper bag version, from last year.
Or, for more fun with science, click over to this week's Science Sunday link-up, at Adventures in Mommydom.
It's great to be a homeschooler.


13 comments:
I love the diorama! I have never heard of making paper mache over aluminum foil and then peeling the foil away. How cool! I think it turned out so well. You are going to have to start a museum!
Making a paper mache cave is a great idea! We do lots of dioramas in our backyard, but soon those days will be over. Mountains and caves maybe, for winter! :)
My kids would love this!
Oh what fun! This would be a fun activity down the road here to do. The cave turned out great!
I love how it can out! We'll have to do this for sure! Thanks for taking the time to share step by step directions! It's so nice and simple. I'll read off the directions for JC to follow!
That is a great diorama. She did a great job on the entire craft.
Oh, who WOULDN'T be distracted by aluminum foil jewelry?
LOVE this craft- my kiddos would enjoy playing with it!
You guys have a lot of fun. This diorama is awesome! Thank you for sharing.
It turned out great!! What a fun activity! :-)
A really applied herself, didn't she? Her project looks great. I am looking forward to more self-directed project some time down the road :)
Great project. I'll have to remember this for later. We're still too hot here for this to make sense to my kids.
I really like how the cave turned out. I we made this I'd save the cave over winter, let the bear wake up in the spring.
Found this while searching for hibernation crafts. Love it! I only homeschool my kindergartner, but I think I'll turn this into a family project for the weekend.
Post a Comment