Saturday, July 30, 2011

How to Make a Mold Terrarium

Start with a clean glass or plastic jar, with a lid, and some small bits of food (no meat or fish).


Place the food in the jar, spaced out as much as possible.


Spray a quick misting of water over the food.


Observe the wet food (this is not really necessary, just kind of fun).
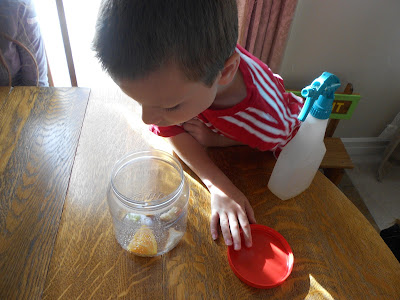

Screw the lid, tightly, onto the jar.


Place the jar into the back of a dark cupboard, and forget about it.

Actually, you might want to check the jar each day to see how your mold is progressing. Just don't open the jar - you don't want to breath in the mold. But, whether you check it, or just forget about it, in a few days, you will have a lovely collection of the stuff.


At least, that's what we understand from the project pages at the back of Frances O'Roark Dowell's Phineas L. MacGuire...gets Slimed!, the second book from The Highly Scientific Notebooks of Phineas L. MacGuire, and our family read-a-loud for the week.

Our mold terrarium (the second of three mold related projects at the back of the book, and the only one I would agree to letting the children do - I drew the line at making our own penicillin, with a dusty lemon wedge, or growing slime mold on a rotting piece of bark) is new, so we don't actually have any mold, yet.

While I was less than enthusiastic about a few of the projects, the children and I really enjoyed the book about fourth grader Phineas L. MacGuire, who has aspirations of being the best fourth grade scientist ever, but so far has only won honorable mention at the his school's science fair.

The book could easily be read alone by the 8-12 year old set, with simple vocabulary, and a generous smattering of entertaining, pencil drawn, illustrations. But, while the interplay between characters, has a quirky, Cleary-esque style, there is just enough Nickelodeon-type irreverence for authority thrown in, in the name of humor, to make it a good, family discussion starter. That, coupled with a fair amount of scientific content, in this case dealing with the fungi kingdom, makes Dowell's book perfect as a read-a-loud.

We already have the two additional books from the series on hold at the library. So, watch for mold terrarium updates, as well as more Phineas L. MacGuire inspired science themed fun, here, in the future.

In the meantime, check out this week's What My Child is Reading link-up, hosted by Mouse Grows, Mouse Learns, for additional children's book reviews and recommendations, or the Science Sunday links, at Adventures in Mommydom, for more science themed fun, and ideas for children.

It's great to be a homeschool.

Friday, July 29, 2011

Crochet Food on a Contact Paper Cooktop


I was busy this afternoon, crocheting up a storm, or maybe I should say a feast, following patterns from Rose Langlitz's Tasty Crochet, on loan from a neighbor.

She, meaning my neighbor, has only made a couple of the patterns herself, but said her cousin made an entire set of play food for her children, and they love them. She thought maybe my children might enjoy them, too.

The book is full of visually appealing photographs, 33 simple patterns, from asparagus to Poptart-like toaster pastries, and a how-to crochet guide at the back, perfect for beginning crocheters. It's just the kind of crochet book I like, full of must do projects, that don't take a lot of concentration, skill, or time to complete.

In fact, working away, while the children were down for a nap, I managed to create a breakfast assortment of pancakes, eggs, and bacon...


...and still had enough time left to put together a quick, tabletop stove. I probably could have taken a little more time, and done a better job keeping the air bubbles out of the contact paper on the stove, but the children don't mind, and I'm sure you get the idea. It's just four construction paper circles for burners...


...and four more, small, white circles for the backs of the knobs, sandwiched between two pieces of contact paper...


...with cardboard circles, for the fronts of the knobs, hooked on top, through the contact paper, with paper fasteners, so they can be turned.


The girls (later joined by their brother) went straight to work, after nap, frying...


...and flipping...


...serving...

...and eating.

My neighbor was spot on - the children absolutely love Tasty Crochet. And, I haven't even shown them the Poptart pattern, yet.

It's great to be a homeschooler.

Thursday, July 28, 2011

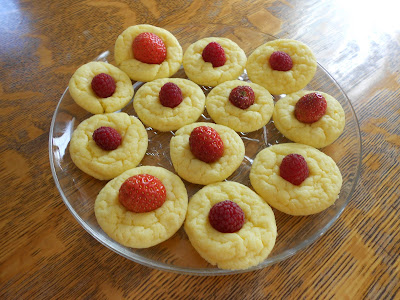
Strawberry and Raspberry Lemonade Cake Mix Cookies


Our short berry season is coming to an end in Montana (or at least in my yard). Yesterday, between the two, we only managed to find a dozen or so ripe berries.


Rather than try to divide the measly harvest among the children, I decided to mix up some tiny, cake mix cookies, using the common cake mix cookie recipe of one cake mix, minus three teaspoons of mix (I used lemon), 1/3 cup of oil, and 2 eggs.

I rolled about a dozen (14 if you want to get specific) tiny balls of dough, 1/4 to 1/2 inch in diameter, and baked them on a greased cookie sheet for 7 minutes at 350 degrees Fahrenheit...


...then pulled them out of the oven, and topped them immediately with one berry each.


They tasted great, and once on a plate, they practically shouted summer tea party.

My only tip would be not to use large juicy berries, as they might mush through the centers of the soft cookies, but small strawberries, and raspberries are perfect.

Of course, 14 tiny cookies hardly put a dent in an entire batch of cake mix cookie dough.

Luckily, I also had a few chocolate chips, that needed to be used up. So, I reduced the oven temperature to 300 degrees, and...


It's great to be a homeschooler.

Wednesday, July 27, 2011

Ballerina Palm Puppet Craft


Our little ballerina is a modified version of a palm puppet from India, we found in Alexandra M. Terizian's The Kids' Multicultural Art Book, Art & Craft Experiences from Around the World.

We started with a folded piece of thin cardboard. Card stock would work nicely, too.


I traced out the body, arms, and legs separately, lining up the top of the bun with fold, and making the body fairly wide, and chunky.


I cut them out, one body, two arms, and two legs...


...and let the girls decorate them with crayons, and pencils...


...on both sides of the pieces.


Then, I punched holes in the corners of the body, and the top of each leg, and arm, so the girls could fasten the legs, and arms inside the body piece, with paper fasteners, after we taped a pencil inside the body, as shown (the picture shows a straw, but it wasn't long before we switched it to a pencil, taped in with duct tape, for added strength).


To make the puppet dance, you hold the pencil between your palms...


...and twirl it gently, back and forth, making the arms, and legs jump up, and down.


The girls absolutely love them. Actually, so does their brother.

I'm sure, we'll be using the pattern from the book, which makes a little man, next.


It's great to be a homeschooler.

Tuesday, July 26, 2011

Who Gets to Pray For Lunch - Spinner Craft


Now that the little ones have gotten old enough to give thanks for the food at mealtimes, we try to give everyone a chance to pray by taking turns, and rotating through the children. But, remembering whose turn it is can be difficult.

E helped me put together a prayer time spinner to solve the problem.

She traced, and cut a circle out of cardboard, and then glued pictures of each of us, to it, that I had printed, and cut out for her.


We punched a hole in the center of the circle, and fastened on a cardboard arrow, with a paper fastener, fastened on the backside.


After a little bending, and adjusting of the arrow, so it could spin easily...


...we were ready to find out, whose turn it was to pray.


Now I suppose, the big debate will be who gets to spin the arrow.

Don't forget to check out this week's Bible Alive! Tuesday link-up, hosted by The Fantastic Five, for more Bible themed fun, and ideas for children.

It's great to be a homeschooler.

Monday, July 25, 2011

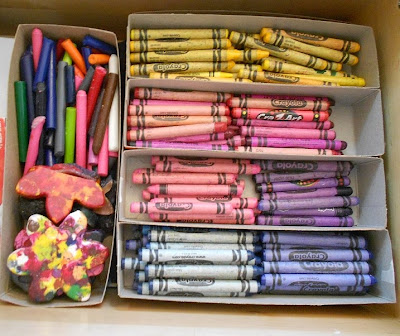
Cereal Box Crayon Caddy


Feeling completely unmotivated today, it seemed like a good time to stick in an audio book, and take on a simple, mindless task, like organizing the crayons in the coloring drawer.

We've always kept one of the bottom drawers in the kitchen reserved for crayons, coloring books, and paper for the children. Generally all the crayons get dumped into one large box.


It keeps them all together, and makes for easy clean-up, but it can also make it difficult to find a sharp crayon, in just the color you want.

I've been thinking for a while about sorting the crayons out by general color, but I wasn't sure what to put them in to keep them organized, that would still fit in the drawer. Finally, it dawned on me the bottom of a cereal box was about the shape of container I needed.


I only had two empty cereal boxes on hand today, so after cutting the bottom off of them, to make the shallow boxes I wanted, I used them as patterns, to cut the rest of the box up into pieces...


...that could be slit on the sides, folded, and glued into additional containers of the same size...


...which I then taped, glued, and secured together with cardboard strips...


...into trays, that could stack in the drawer, plus one loose box, to put broken crayons into (if a person had enough storage space, a cardboard strip for a handle, across the top, would also be a nice touch).


While the glue on the trays dried, held in place with clothespins, I peeled the broken crayons, so they would be ready for future crafts.


Then, I filled the boxes...


...stacked them up...


...and put them in the drawer. I don't know how long they'll stay organized...


...but they drew immediate attention, inspiring a flurry of creativity, already tonight.


It's great to be a homeschooler.