Wednesday, June 29, 2011

Bread Maker Cinnamon Roll Pull Apart Bread


I've been drooling over the recipes from Plain Chicken, for a while now. Have you visited that blog? I'm pretty sure a person could gain weight from paging through the pictures there.

This week, her cinnamon roll pulls caught my eye, and I couldn't resist trying out the recipe, or a slightly modified version of it anyway, for breakfast, this morning.

Last night, I set the bread maker humming with a loaf of cinnamon bread, as opposed to Plain Chicken's round loaf of uncut sourdough. I would love to have made ours cinnamon raisin nut bread, but I can never seem to catch the "add in" beep. So, I settled for cinnamon.

Gold Star Breadmaker Cinnamon Bread

(sort of)

For a 1 and 1/2 lb. loaf add in the order below:

  • 1 cup + 2 TBL water

  • 1 and 1/2 TBL milk

  • 1 and 1/2 TBL butter, chopped into small pieces.

  • 3 cups flour (bread or multi-purpose)

  • 1 tsp salt

  • 3 TBL brown sugar

  • 2 tsp cinnamon

  • 1 and 1/2 tsp bread machine yeast (regular, quick rise yeast will work, too)

Set the bread machine to specialty bread, on a light crust setting. Add 1/3 cup of raisins, and 1/3 cup of chopped walnuts at the beep for the last mixing, if desired, and if you can catch it.


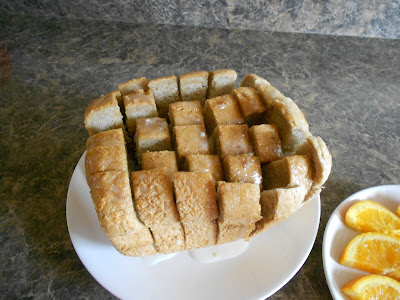
This morning, I sliced the bread, almost all the way, but not quite through the bottom crust...


...and buttered between the slices. Plain Chicken has a recipe for honey butter, that sounds wonderful, but I wasn't so sure the children would take to it, so I stuck with plain old butter.


Then, I sliced across the bread the other way, again stopping at the bottom crust, and slathered on more butter (no one ever said something with cinnamon roll in the title, should be low calorie).


I sprinkled about a cup of brown sugar between the slices, and lined a pan with tinfoil...


...to wrap it up for baking.


I popped it in the oven at 350 degrees for 30 minutes, before drizzling it with a powder sugar glaze (1 cup of powder sugar mixed with 2 tablespoons of milk), and serving it up warm, and gooey.


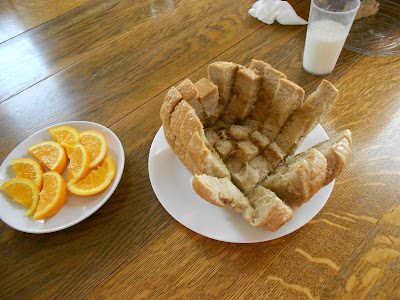
It never stood a chance. The picture below is what happened, in the time it took me to turn around, and grab my camera.


The children declared it as good, if not better than cinnamon rolls. I'm not convinced it was any less work, than making the real thing, what with all that slicing, and buttering, wrapping, and baking. Even so, it received enough praise, and appreciation, I won't be afraid to make it again.

It's great to be a homeschooler.

Mason Jar Spin Art Fun


With a friend visiting, this week, the older girls have been having a lot of special fun, and the younger girls have been feeling left out. I wanted to do a project just with and for them, but one that wouldn't take too much extra effort, or make too big a mess.

I rolled out a couple of sheets of butcher paper. And, set out our washable kid's paint, along with a couple of jars.


I blobbed paint on the bottoms of the jars (a little too much paint in the case of the picture below).


Then, the girls turned the jars over...


...twirled them around...


...and voila! We had a glorious, swirly, contained, mess. To make good swirls it takes a few fresh paint blobs for each swirl, but with less paint, than the for the first one.


The girls made quite a few colorful circles, before they ask for paint brushes to add details to fireworks...


...Dr. Seuss-ish trees...


...and, of course, caterpillars.


C (age five), decided to smear all her swirls together into what she titled...


...a storm at sunset.


It's great to be a homeschooler.

Tuesday, June 28, 2011

Homemade Glow-in-the-Dark Play Dough With a UV Boost


On a whim this week, I pulled out our play dough (the homemade, cooked, with cream of tarter, kind), and mixed some Rust-Oleum glow-in-the-dark, latex paint into it.


The paint mixed in just fine, and thanks to a plastic baggie, wasn't even that messy to do. Once it was completely mixed in, the paint was "absorbed" by the play dough, and no longer came off on our hands.


Unfortunately, it really didn't glow in the dark very well, either. I think the amount of paint needed to get a good glow, would make the play dough too sticky for play. Even then, the light only hits the top, outer layer, of the dough, so while it glows lightly, as soon as you squish, or reform it, the "dark matter" from the inside surfaces, and blocks out the glow.

Still, glow-in-the-dark play dough sounded like too much fun to give up on. That's when the Man of the House came to the rescue with his Streamlight, UV LED flashlight, pulled from his hunting supplies. You can find inexpensive (in the 5-10 dollar range) handheld UV lights at the big box stores, or online.

It's the kind of light that makes quinine, or tonic water glow green.


It also super boosts glow-in-the dark paint, so that when we bathed our play dough in the light...


...we got the "oooh - aaaah", really cool reaction we were looking for.


In fact, the ultraviolet light not only boosted the glow power of the paint, it totally energized the children's interest in their play dough.


They went right to work, creating all kinds of freaky little aliens, to bath in the UV light, and then plunge into the darkness.


And, just in case you're curious, I did try mixing up a new batch of play dough, using tonic water instead of tap water. Sadly, it (along with a few other experimental drinks, and desserts) didn't glow at all under the light, but more on that later.

In the meantime, we didn't have any adverse skin reactions to playing with the paint laden play dough, but you might want to proceed cautiously. The same can probably be said for playing with a UV LED light source. And, if you have a child with latex allergies, I'd probably skip this one, all together. Otherwise, jump right in, it's a lot of fun.

It's great to be a homeschooler.

Sunday, June 26, 2011

Glow In the Dark Paper Plate Ring Toss and Splatter Paint Mason Jars


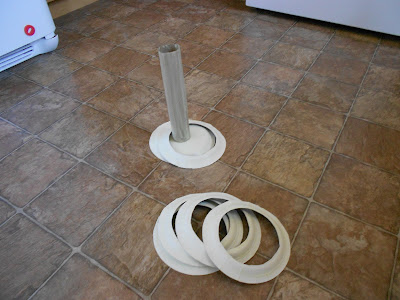
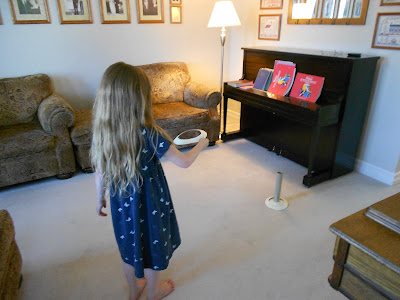
Paper plate ring toss is fun...


...but glow in the dark, paper plate ring toss is even better.


To get the lovely glow above, I used two coats of Rust-Oleum's latex, glow in the dark paint. I've been pretty impressed with the seven ounce can I purchased. I've had enough to paint six, Popsicle stick bracelets, one ketchup sketcher, to test some out in play dough (more on that later), and still had more than enough left to make a few splatter paint, stars in jars.


Though, I do have to say, the jars are probably more work than they're worth.

I found the only way to keep the paint from running, was to lay the jars on their sides, while I was flinking the paint covered brush into them. Then, each side had to dry, before the other side could be done, and it took several applications of paint to get a starish look.


Of course, my paint glows green, so starish isn't exactly the right term.


I think to get the really neat look of the picture being posted, and reposted across the Internet (click here to see it)...


...takes a bit of photographic trickery.


Our picture is not nearly as clear, or whimsical as the original, but we had a good time giving it a try. And, we still have a little paint left...

It's great to be a homeschooler.

Saturday, June 25, 2011

Homemade Chocolate Teddy Grahams


I found a recipe for chocolate graham crackers on the King Arthur Flour site, and thought it would be fun to mix up a batch of the dough for the girls to turn into little teddy grahams.

You can click the link above, to find the recipe. I didn't have Dutch-process cocoa, so I substituted unsweetened baker's cocoa.


The dough was quite sticky, so we sprayed our hands with a bit of baking spray, before we started working with it.


Then, we just rolled out little balls, and pieced them together into bears, adding the final details of eyes, and belly buttons, with a toothpick.


It was tedious work, but the girls were too busy having fun together to notice.


Of course, they weren't exactly aiming for perfection, either.


We baked the teddy grahams at 325 degrees, for 15 minutes, as per instruction. They flattened out a little, while baking. The children thought they were hilarious.


I rolled the last bit of the dough out flat, to see how they'd be as normal graham type crackers.


I ended up having to cut them apart, and repoke them with a fork, after they baked, but I was happy with the end result. Judging from how quickly the children polished of our plate of crackers, I'd say they liked them, too.


It's great to be a homeschooler.