Tuesday, January 24, 2012

Proverb Cookies

Yesterday, Natalie over at Mouse Grows Mouse Learns posted about making fortune cookies, with her daughter, for the Chinese New Year. That reminded me of an idea the girls brought home from their aunt, for putting Bible verses into "fortune", or in this case - Proverb cookies.

The book of Proverbs is full of sage advice, dispensed out in bite sized couplets, perfect for wrapping up into cookies. The girls had a good time this morning, sorting through the book, picking and choosing their favorites.


After they had half a dozen proverbs printed out on strips of paper, we went to work mixing up the cookie dough, following the same "easy" recipe from Allrecipes.com, that Natalie had managed with success.


It didn't work as well for us.


Personally, I blame the Easter Egg Chicken eggs, we picked up from some of our homesteading friends. They come in beautiful shades of pink and green, but are very tiny. We might have needed to add an extra egg white to the recipe to compensate for the size.


Then again, it might have been user error. We had equally poor success with a second, oil based recipe from MomsWhoThink, which is even prefaced with the assurance:

A good fortune cookie recipe is as hard to come by as a good fortune in your cookie! This is the best one yet.


The greasy, sugar cookie like dough made for tasty cookies, but no matter how hot out of the oven they were, we couldn't manage to fold them around our slips of paper, without breaking them into pieces.


It wasn't a bad dough for wrapping, before baking, around chocolate chips, though.


As for the Proverb cookies...


...I found a terrific crochet pattern...


...and had a batch made up in no time. Bringing to mind another bite of Biblical advice:

Ecclesiastes 6:11 Sow your seed in the morning, and at evening let not your hands be idle, for you do not know which will succeed, whether this or that, or whether both will do equally well.

Or, in other (Proverb cookie sized) words...


...always have a backup plan!


It's great to be a homeschooler.

Linked with Bible Alive! Tuesday at The Fantastic Five.

Monday, January 23, 2012

Mini Tea Cup and Saucer Crochet Pattern

There's nothing better on a cold, gray, rainy afternoon, than a good audio book and a crochet project to keep your hands busy, unless maybe it's having a sunny cup of tea with your best sister.

I'm not happy with the teapot design, just yet. I'll keep tinkering with that. But, the cups and saucers turned out just the way I hoped, so I'll share the pattern, and record it for myself, below.

Cup
Chain 2.
Row 1: 6 sc (single crochet) in the first chain.
Row 2: 1 sc in first stitch, 2 scs in the next stitch, repeat 2 more times (9 stitches)
Row 3: 1 sc in the first 2 stitches, 2 scs in the next stitch, repeat 2 more times (12 stitches)
Row 4: 1 sc in the first 3 stitches, 2 scs in the next stitch, repeat 2 more times (15 stitches)
Rows 5 - 9: 1 sc in each stitch.
Tie off and weave in loose ends.

Handle
Leaving a tail for sewing on chain 4.
Sc in the second stitch from the last, and in the remaining stitch.
*Chain 1 and turn
Sc in the two stitches across*
Repeat between *s for more 6 rows.
Tie off, use the tail to sew the two long edges together.
Sew to cup.

Saucer
Chain 2.
Row 1: 6 sc in the first chain.
Row 2: 1 sc in the first stitch, 2 scs in the next stitch, repeat 2 more times (9 stitches)
Row 3: 1 sc in the first 2 stitches, 2 scs in the next stitch, repeat 2 more times (12 stitches)
Row 4: 1 sc in the first 3 stitches, 2 scs in the next stitch, repeat 2 more times (15 stitches)
Row 5: 1 sc in the first 4 stitches, 2 scs in the next stitch, repeat 2 more times (18 stitches)
Row 6: 1 sc in the first 5 stitches, 2 scs in the next stitch, repeat 2 more times (21 stitches)
Tie off and weave in loose ends.

It's great to be a homeschooler.

Sunday, January 22, 2012

Peanut Plant Update

Last weekend we noticed our raw peanuts were not only sprouting roots, but also leaves.


Well, one had leaves, one had the beginning of a leaf, and one was just starting a root, but we decided it was time to move them out of the napkin filled cup and into an actual pot.

The children helped me prepare a large container with a small bag of vermiculite (to keep the soil loose), a few cups of sand (peanut plants like a sandy soil)...


...and a small bag of Miracle Grow potting soil.


I gave them a garden trowel to mix the dirt, and prepare one hole at a time for the plants. Playing with dirt inside the house was huge hit with the younger girls, who got to help by pouring water into the holes...

...and gently closing the dirt around the plants, while their sisters held the peanuts in place, keeping the roots down, and the leaves up.

After a week of keeping the soil lightly watered (too much water will rot the roots), Plant A (the one with leaves) has continued to grow taller, and is beginning to look well established.
Plant B (the one with just the beginning of a leaf) has sprouted above the dirt.


But, we are still waiting to see if Plant C (the one with just the beginning of a root) survived the transplant. It should take around 4 months for the plants to mature. I will try to post a monthly update, assuming we can keep them alive that long. It's a long shot for plants in our house, but time will tell.

In the meantime you can find more science themed ideas and activities for children at this week's Science Sunday link-up over at Adventures in Mommydom.

It's great to be a homeschooler.

Saturday, January 21, 2012

Our Penguin Party


The decor for our party was very simple. Besides the penguin tablecloth with built in place mats, there was just the presents...


...wrapped as construction paper penguins...


...and a painted penguin, taped to the wall...


...for a game of Pin the Bow Tie on the Penguin.


Instead of a large pinata, I made individual sized "penguin eggs" (much like the dinosaur eggs I made for the children previously)...


...each filled with a sheet of penguin stickers, a penguin themed gummy fruit snack, and a hand sewn penguin bean bag.


The children had to waddle across the room penguin-style to the eggs, and then carry them back across the room on their feet, before opening them.


Then, they used the bean bags to toss...


...at ice blocks (squares of felt)...


...worth various amounts of points.


Finally, we played a rousing game of penguin bowling...


...knocking down painted pop bottle penguins with a rolled up sock "snowball"...


...and blew toilet paper roll penguins down the ice slide (a strip of freezer paper), to see whose penguin could make it the farthest without going off the edge of the ice.


While waiting for the cake, the children also used the painted cup penguins place markers, turning them to the black back sides, so the names weren't showing, for shell type games of find the egg, or M&M as it was in our case.

The cake was made by starting out with two 9'' cake rounds, and cutting one as pictured.


Both were popped into the freezer for a few hours for easier frosting (it keeps the cut edges from crumbling when you frost them). Then, the uncut cake round was frosted, with a well whipped butter cream frosting...


And, some of the cut pieces were stacked on top, and frosted one by one, in a stair stepish pattern.


A melted, and cooled, Jolly Rancher (blue raspberry) was placed into the frosting to resemble water.


The whole thing was sprinkled with powdered sugar...


...and finished off with a Tube of Penguins from Safari Ltd, which served as one last present.


It's great to be a homeschooler.

Friday, January 20, 2012

Snow Play Dough - Made With Real Snow

Our snow, our beautiful snow, that brought us so much joy over the past two days, is melting, has probably already melted by the time you read this. Even as I type now, snowmen all over the neighborhood are teetering and toppling, with snowflakes turning to rain.


But not to worry - we saved some. I brought in a bowl full, and told the younger girls (ages 5 and 7) we were going to transform it...


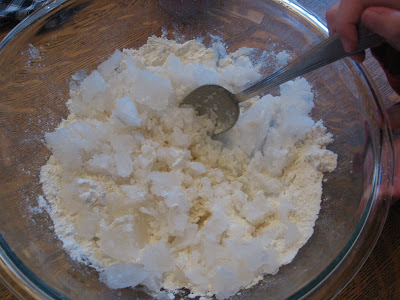
...by mixing it with flour, salt, cream of tarter, and a splash of vanilla for good measure.


I had checked the water content of the snow ahead of time by melting a cup worth on the counter, so I knew one cup of our snow would yield slightly less than a half cup of water. Which meant for 1 cup of flour, 1/2 cup of salt, 2 tablespoons of cream of tarter, and a teaspoon of vanilla, we needed somewhere around 2 1/2 cups of snow.


We chopped it up, and stirred it in, until it was looking fairly sloggy.


Then, we popped it in the microwave for a minute...


...and stirred it...


...and continued microwaving and stirring at 30 second intervals until it was looking somewhat solid. The girls' attention had turned to what remained of the bowl of melting snow, and they didn't see me pull the blob from the bowl to pat and knead it until it was smooth...


...so they were quite impressed when I dramatically presented them with the transformed snow.


I should mention, that while this trick worked like gangbusters with the younger crowd in the house, the older children rolled their eyes, and walked away as soon as they saw the ingredient list. Apparently, they were already on to the whole snow-turns-into-water thing. Even so, the younger girls, who never turn down a chance to play with play dough, were happy in the knowledge there was real snow, our snow, in the dough.

It's great to be a homeschooler.