Sunday, February 27, 2011

Sugar Density Rainbow, Or Success At Last!

Every year, as St Patrick's Day approaches, I find myself attempting the sugar density rainbow experiment, with the children. You probably know the one - where you take six bowls...


...and add an increasing amount of sugar to each bowl, 1 tablespoon in the first, 2 tablespoons in the second, and so on.


Then, you add food coloring to each bowl, according to the colors of the rainbow...


...send small children a safe distance away...


...and dissolve the sugar, and food coloring, in a cup of boiling water for each bowl.


Finally, you carefully pour a little of the water from each bowl into a glass, or clear mug, starting with the purple, or most dense, and ending with the red, or least dense. Of course, if you've tried this yourself, you know no matter how carefully you pour in the water, it generally all mixes. Leaving you with a very non-rainbowish cup of brown sugar water.

This year though, I was determined not to be defeated by a children's experiment. Especially since it's one of those experiments you see all over the Internet, and in countless children's science books. Clearly, either everyone is lying, or it is possible to make this experiment work.

So, we just kept trying, and trying, and trying, and finally found a solution.

Instead of starting with the most dense liquid, we started with the least dense. But, first I transferred all the sugar water solutions into taller glasses, so we could use a straw, as an eye dropper, by dipping it into the liquid, and covering one end with a thumb, to transfer it to our test tube (actually it's a cleaned out container from the Gak you can buy at the supermarket - but it looks like a big test tube).


We moved from least dense to most dense, releasing each new layer on the bottom of our test tube, with the straw, instead of trying to pour it onto the top. This method was a little difficult for my youngest, who had a hard time leaving the straw on the bottom of the tube until all the liquid was out of it.


But, the older children managed it with ease. Now maybe, we'll be brave enough to try the ocean currents, liquid layering experiment from All Things Beautiful.


For more fun with science, check out this week's Science Sunday link-up at Adventures in Mommydom.

It's great to be a homeschooler.

G's Giant Chocolate Peanut Butter Cookie Supreme

G took over the kitchen last night, to make a giant cookie creation.

Actually, she had some other "experimental" cookie ideas, but as it was growing late, and there wasn't time for a lot of trial, and error, she settled for my suggestion of a giant cookie.

As a matter of coincidence, I had been paging through WhiMsy Love's archives, and was just looking at her giant cookie attempt, when G asked if she could make some cookies - so giant cookie it was - on the stipulation, that she could alter the recipe from the back of the chocolate chip package, and make it her own type of cookie.

Which she did:

G's Giant Chocolate Peanut Butter Cookie Supreme

(This recipe has not been proofed, so if something looks really wrong, please speak up - in a kindly manner.)

  • 2 cups flour
  • 1/2 cup unsweetened baker's cocoa
  • 1 teaspoon baking soda
  • 1/2 teaspoon salt
  • 1 cup shortening (G used butter flavored Crisco)
  • 1/2 cup granulated sugar
  • 1 cup, packed, brown sugar
  • 1 1/2 teaspoons of vanilla
  • 2 eggs
  • 1 10 oz package of peanut butter chips
  • Candy sprinkles (optional)


Preheat the oven to 300 degrees Fahrenheit.

Cream together the sugars, shortening, vanilla, and eggs. Mix in the dry ingredients, adding the peanut butter chips last.

Cover a large (15'' diameter) pizza pan in tinfoil, and spray with a non-stick cooking spray.

Dump all of the cookie dough into the center of the pan, and pat it out flat toward the edges of the pan. Leave an inch, or so, of free pan space around the edge, to allow room for the cookie to grow.

If desired, cover with candy sprinkles.

Bake at 300 degrees Fahrenheit for approximately 30 minutes, or until the edges start to brown, and the center seems somewhat firm. Allow the cookie to sit on the pan for another 5 to 10 minutes, out of the oven, to finish baking on the bottom.


Slice (although if your mother is around she will probably cut your slices in half), and serve.


After reading the post on WhiMsy Love, I was a little nervous about the possibility of the dough outgrowing the pan, and making a mess in the oven, so I placed a larger pan on the rack beneath the cookie. This kept the bottom of the cookie from baking quite as well, as it would have otherwise, and ended up being unnecessary, so I wouldn't advise it.


Even so, G, and her siblings, were pleased with the results. Not to bad for an 11 year old.

****By way of extra note - once the cookie was cooled completely, it was not doughy on the bottom at all.****
It's great to be a homeschooler.

Saturday, February 26, 2011

Refurbishing Old (Recycled) Toys


One thing we've learned, as we've been studying Frank Lloyd Wright, is the amount of upkeep his houses (and all older homes) require. Owners have to deal with crumbling cantilevers, leaking roofs, and pealing paint. Restoration is a continual process.

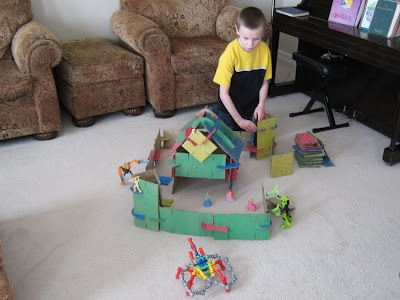
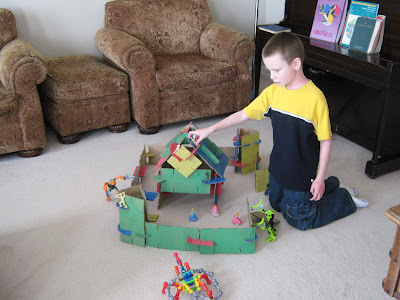
In keeping with the spirit of restoration, the girls decided to paint our cardboard building shapes.


Remember our geo-building shapes?


The ones we cut from the dismantled remains of our cardboard submarine?


Well, they're still around. Painting them was really more of a refurbishing, than a restoration project, because they were never painted in the first place. But, adding color restored the children's interest them. They ran out of table space, and time, and so only painted the fronts of most of the pieces.


Even so, the Disney Princesses didn't seem to mind.


I'm not super crazy about the rough texture of the Crayola Washable Paint, but the bright colors really attracted the children (and apparently a host of monstrous toys).


It's amazing what a fresh coat of paint can do to breath new life into a house...er...toy.


It's great to be a homeschooler.

Friday, February 25, 2011

What's In The Bible Popsicle Stick Theaters - And A Give Away!!!

I noticed the folks at What's In The Bible are now offering free printables of their popsicle stick theaters - sooo much easier than screen printing them from the online videos!

And, they were sweet enough to send us a free copy of their first DVD, What's in the Bible - In the Beginning, too. They sent us the DVD in response to our craft suggestion, not as a promotion, but of course we already have a copy, and love it (click here to see our review).

So, I was wondering if one of you might like this copy? I can't say enough good things about the series. It's a terrific way for children to have fun, and learn about the Bible at the same time.
If you live in the United States, and don't have a copy of this DVD, but would like one for your children, then leave a comment on this post, sometime this week, with an email where I can reach you. I'll draw one name from the comments next Friday (March 4, 2011), to receive this extra copy.
It's great to be a homeschooler.

Designing Houses With Frank Lloyd Wright

The setting for Blue Balliet's The Wright 3 is the Robie House in Chicago's Hyde Park neighborhood.

Researching the house, led us to the website of the Frank Lloyd Wright Preservation Trust, the organization currently responsible for the care, and upkeep of the house. On their website we found, not only a virtual tour of the restoration of the house, but also a terrific curriculum guide for The Wright 3, and a link to Architect 3D Studio, where my older girls (ages 10 and 11) spent the afternoon, yesterday.

The program, which reminds me of a scaled down Zoo Empire, allows students to choose clients, and a sight location, and then to design a house that will meet the needs of both. Houses are designed on a 2D blueprint, but then can be viewed in 3-dimensional representations. Frank Lloyd Wright (or an animated version of the architect), pops up from time to time, with helpful advice, as children choose everything from window placement, to furniture, and landscaping.

Bravo to the Frank Lloyd Wright Preservation Trust, for providing so many useful, and engaging, architectural activities for children, free of charge.

It's great to be a homeschooler.

Thursday, February 24, 2011

Toilet Paper Tube Tinker-Like Toys


I mentioned in an earlier post, that we've moved back one book, in our family reading of Blue Balliett's art based mystery series for children.

The Wright 3, centers around Frank Lloyd Wright, and more specifically the Robie House, in Chicago's Hyde Park neighborhood. We've spent quite a bit of time walking past it, and around the area, on Google Maps. I think I've mentioned before too, how much I love the "street view" feature on Google Maps. It's just great for virtual field trips.

We've also been learning about the architect from a number of sources (more on these later)...


...but I will warn you, if you're studying Frank Lloyd Wright with children, proceed with caution. He was not at all a moral individual, and his life was touched by some very violent tragedy.

Also, you might want to have some building toys ready for your children to experiment with, after reading about his architectural career. The Froebel Gifts (or building toys), that he held dear as child, would be fun to have around, but they are quite expensive, as far as wood blocks, and colored paper go.

I found an alternative, in the recycle bin.


Using a hole punch, I made holes all the way around both ends, of a number of empty toilet paper tubes.


Then, I enlarged the holes, by pushing a sharpened pencil through them, until they were big enough to easily fit unsharpened pencils through.


Straws, or wood dowels, or even rolled up tubes made from scrap paper would work equally well, we just happen to have a large number of unsharpened pencils handy.

I also took some of the tubes, and made four slits into the bottom end, and holes on the top...


...just to mix things up a little.


It's great to be a homeschooler.

Wednesday, February 23, 2011

Sugar Cookie Pinwheels - like Origami for Dough


Okay, so pinwheel cookies aren't exactly origami, or would that be ori-cookies?

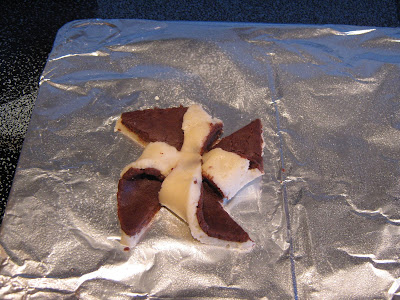
Either way, I just couldn't resist making them, to celebrate our success with this origami pinwheel from Kathleen Thorne-Thomsen's Frank Lloyd Wright for Kids, His Life and Ideas, 21 Activities.

Either we're getting better at origami, or we're finding easier, and easier projects to attempt.

For those of you who follow along regularly, and might be wondering why we've pulled Frank Lloyd Wright into our origami obsession (really it's more of a mild interest, than an obsession), suffice it to say, we finished listening through Blue Balliett's The Calder Game, and have moved back one book in the series to The Wright 3, which is written around the work of the famous architect.

I was pretty pleased when I discovered two of the 21 activities in Thorne-Thomsen's book, which I brought in from the library to supplement our family reading, explore Wright's love of design, through origami.

As to the cookies:

We took one batch of sugar cookie dough, and divided it in two. I've requested from the author of Alphabake, A Cookbook and Cookie Cutter Set, permission to share the recipe here, but I haven't heard anything back, but any sugar cookie recipe will do.

We added a couple of tablespoons of baker's cocoa to one half of the batch, and rolled both halves out as flat as possible.

Using a wax paper template, we cut 3.5 inch squares from both types of dough...


...stacking them together on a greased cookie sheet (our nod to the two-colored origami paper). You could make this even easier, by using only one type of dough, and sprinkling the top with candy sprinkles, or colored sugar.


We cut in, diagonally, from each corner with a butter knife, stopping about an inch from the center.


Then, we folded in one corner (all rights, or all lefts), from each triangle, to the center...


...holding the dough in place with a chocolate chip...


...and baked them, as usual, at 350 degrees Fahrenheit, for 10 to 12 minutes.


It's great to be a homeschooler.