I was feeling lazy this morning - cloudy morning, throw some cereal on the table, and stare at the computer, lazy. I really wasn't even sure I could muster enough energy to blog, today. I barely managed to move the mouse over, and click on a few of my favorite blogs, to read.
So, I was more than happy to find Ticia, over at Adventures in Mommydom, linking in with a Lazy Meme hosted at Making Home. The original post is nearly a month old, but still seems to be open to join in - so why not? Really, a Lazy Meme, what could be more perfect for today, than that!?!
The instructions with this are to copy the list, and bold the items you've done, leaving the others in normal type. So here goes.
1. Started your own blog
2. Slept under the stars
3. Played in a band
4. Visited Hawaii
5. Watched a meteor shower
6. Given more than you can afford to charity
7. Been to Disneyland/world
8. Climbed a mountain (just a 12,000 footer - no ropes or gear needed)
9. Held a praying mantis
10. Sang a solo
11. Bungee jumped
12. Visited Paris
13. Watched a lightning storm at sea (from the shore)
14. Taught yourself an art from scratch
15. Adopted a child
16. Had food poisoning
17. Walked to the top of the Statue of Liberty
18. Grown your own vegetables
19. Seen the Mona Lisa in France
20. Slept on an overnight train
21. Had a pillow fight
22. Hitch hiked
23. Taken a sick day when you’re not ill
24. Built a snow fort
25. Held a lamb
26. Gone skinny dipping
27. Run a Marathon
28. Ridden in a gondola in Venice
29 Seen a total eclipse
30. Watched a sunrise or sunset
31. Hit a home run
32. Been on a cruise
33 Seen Niagara Falls in person
34. Visited the birthplace of your ancestors
35. Seen an Amish community
36. Taught yourself a new language (tried to anyway)
37. Had enough money to be truly satisfied
38. Seen the Leaning Tower of Pisa in person
39. Gone rock climbing
40. Seen Michelangelo’s David
41 Sung karaoke
42. Seen Old Faithful geyser erupt
43. Bought a stranger a meal in a restaurant
44. Visited Africa
45 Walked on a beach by moonlight
46. Been transported in an ambulance
47. Had your portrait painted
48. Gone deep sea fishing
49. Seen the Sistine Chapel in person
50. Been to the top of the Eiffel Tower in Paris
51. Gone scuba diving or snorkeling
52. Kissed in the rain
53. Played in the mud
54. Gone to a drive-in theater
55. Been in a movie
56. Visited the Great Wall of China
57. Started a business
58. Taken a martial arts class
59. Visited Russia
60 Served at a soup kitchen
61. Sold Girl Scout Cookies
62. Gone whale watching
63. Gotten flowers for no reason
64 Donated blood, platelets, or plasma
65. Gone sky diving
66 Visited a Nazi Concentration Camp
67 Bounced a check
68. Flown in a helicopter
69. Saved a favorite childhood toy
70. Visited the Lincoln Memorial
71. Eaten Caviar
72. Pieced a quilt
73. Stood in Times Square
74. Toured the Everglades
75. Been fired from a job
76. Seen the Changing of the Guards in London
77. Broken a bone
78. Been on a speeding motorcycle
79 Seen the Grand Canyon in person
80. Published a book
81. Visited the Vatican
82. Bought a brand new car
83. Walked in Jerusalem
84. Had your picture in the newspaper
85. Read the entire Bible
86. Visited the White House (but the line was too long to go in)
87. Killed and prepared an animal for eating (I leave that to the Man of the House)
88. Had chickenpox
89. Saved someone’s life (I'm a mother, right?)
90. Sat on a jury
91. Met someone famous
92. Joined a book club
93. Lost a loved one
94. Had a baby
95. Seen the Alamo in person
96. Swam in the Great Salt Lake (Ew!)
97. Been involved in a lawsuit
98. Owned a cell phone
99. Been stung by a bee
It's great to be a homeschooler.
Monday, July 25, 2011

Sunday, July 24, 2011
Tissue Paper Beaded PipeButterfly
How do you turn a messy pile of tissue paper scraps into a beautiful butterfly?

Simply add a couple of pipe cleaners, and some watered down glue (two parts school glue to one part water, works pretty well).

Cut the tissue paper into one, or two inch squares. The size doesn't matter so much, the bigger the square, the bigger the bead, but it's good to have them all basically the same size.

Twist the pipe cleaners together, near the top, to make the antennae. The butterfly design comes from David C. Cook's Children's Church, Red Edition, Craft Book, but they suggest using pony beads. We didn't have pony beads, so we proceeded to make our own, tissue paper beads by...

...folding the tissue paper squares into rectangles...

...immersing them in the watered down glue...

...then wrapping them around the pipe cleaner, and squishing them into bead shapes. This is an easy enough process for youngish children, but messy. You definitely want to cover your workspace.
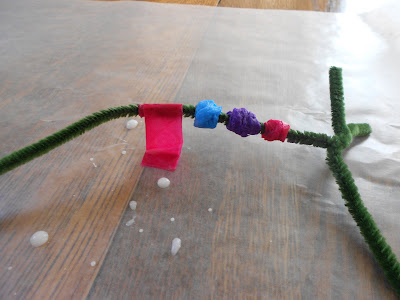
It takes about 40 beads to cover the pipe cleaners.

To finish forming the butterfly, scoot the beads carefully apart, about 10 down from the top, and twist the two pipe cleaners together at the gap, into a loop, to make a sort of bow, for the top of the wings.

Then, loop the bottom ends up, to twist around the middle, making loops for the bottom of the wings.

Let the beads dry completely - it took slightly more than a day for ours to dry, and thread a piece of yarn through the wings, to hang, or use as a necklace.

It's great to be a homeschooler.

Simply add a couple of pipe cleaners, and some watered down glue (two parts school glue to one part water, works pretty well).

Cut the tissue paper into one, or two inch squares. The size doesn't matter so much, the bigger the square, the bigger the bead, but it's good to have them all basically the same size.

Twist the pipe cleaners together, near the top, to make the antennae. The butterfly design comes from David C. Cook's Children's Church, Red Edition, Craft Book, but they suggest using pony beads. We didn't have pony beads, so we proceeded to make our own, tissue paper beads by...

...folding the tissue paper squares into rectangles...
...immersing them in the watered down glue...
...then wrapping them around the pipe cleaner, and squishing them into bead shapes. This is an easy enough process for youngish children, but messy. You definitely want to cover your workspace.

It takes about 40 beads to cover the pipe cleaners.

To finish forming the butterfly, scoot the beads carefully apart, about 10 down from the top, and twist the two pipe cleaners together at the gap, into a loop, to make a sort of bow, for the top of the wings.

Then, loop the bottom ends up, to twist around the middle, making loops for the bottom of the wings.

Let the beads dry completely - it took slightly more than a day for ours to dry, and thread a piece of yarn through the wings, to hang, or use as a necklace.

It's great to be a homeschooler.
More Air Bubbles in the Ice

After investigating the cause of the white spots in our ice cubes, for Science Sunday last week, and determining they were mainly made from air bubbles, corralled into a group, as the water froze around them, we had a couple of commenters suggest boiling the water twice, might remove more of the bubbles.
Naturally, we had to give it a try. We set up four cups, one with unboiled tap water, as a base line, one with filtered water boiled once and covered, to keep additional air from getting into it (or it at least that was the hope), one with the water double boiled, and one double boiled and covered.
We had an indication, almost immediately, that double boiling was not going to remove the white spots from our ice. We could see air bubbles, along the bottom and edges of the inside of the cups, as soon as we poured the boiling water into them, whether it was boiled once, or twice.

And, sure enough, when we checked the ice cubes later, all four had about equal sized areas of white.

The ice cubes from the covered cups were interesting though, because they had crystal designs in the ice, where the bubbles seemed to spray out from the white spots toward the edges. Was this because the covered water froze faster, or maybe because of the way the water drops condensed on the plastic wrap, and then dropped back down into the cup?

We really aren't sure, but now we have even more to look into. And, if nothing else, the designs in the ice were very pretty to look at in the sunshine.
It's great to be a homeschooler.
This post is linked with this week's Science Sunday link-up at Adventure's in Mommydom, where you can find more science projects and ideas for children.
Saturday, July 23, 2011
Rolling, Egg Carton, Baby Buggy Craft
The girls wanted to make a baby buggy craft they saw in Kathy Ross' Crafts for Kids Who are Learning About Transportation. I borrowed the book from the library in hopes of finding a craft to do with my youngest son. But, he was too busy building his own transportation crafts (mainly spaceships) out of Legos, to even look at it.
So, baby buggies it was. You can find Kathy Ross' instructions in a preview of the book, on Google Books. Or follow our modified instructions below, to make a buggy with wheels that roll.
Cut a few egg cups out of a cardboard egg carton - you need two for each buggy.

Punch four holes, in pairs, across from each other, in one of the cups.

Thread a couple of bread ties through the holes, to serve as axles for the wheels.

Glue the second egg cup, on its side, inside the first egg cup, so that it is just above, and not quite touching the bread ties.

Glue on a bread tie handle.

Loop the bread tie axles through the holes of four buttons of the same size. You might have to make one axle longer than the other, to keep the buttons from touching.

Add a little ribbon trim, and a pom-pom "baby", and you're good to go.

It's great to be a homeschooler.
Friday, July 22, 2011
Drawing With Chalk on Wet, Starched Fabric

We experimented with chalk, and starch drawing today, with an idea from MaryAnn F. Kohl's Preschool Art: Drawing (you can preview the book in Google Books).
I cut a few scraps of cotton fabric into squares, and gave them a quick soak in liquid starch.

Wringing the squares out...

...I laid them flat, in pans, and had the girls color on them with colored chalk.

It worked out great, as the starch not only let the chalk blend out a bit, but really brightened the colors, and "set" it on the fabric (as long as it's not washed), so it won't rub off.

Making the dried pieces perfect for hanging - framed in popsicle sticks, stretched across embroidery hoops, or with twigs and twine, or whatever happens to be handy.

It's great to be a homeschooler.
Thursday, July 21, 2011
One Last Blast-Off, Story and Craft

We said goodbye to the space shuttle program today...

...with a printable, cut and glue, rocket craft/toy from Dollar Store Crafts...


...and Herman Parish's Amelia Bedelia, Rocket Scientist?

Because, when it comes to career options, we can't all be rocket scientists. But, kitchen chemists, or ditsy housekeepers? Well, you know...

It's great to be a homeschooler.
For more story themed arts and crafts for children, check out the stART (story + ART) link-ups, at A Mommy's Adventures.
Scrap Yarn Art for Children

A (age 10) came home from a library sponsered craft session, with a pretty, little, scrap yarn, heart glued to a piece of cardboard.

It looked like something the younger girls might like too, so I cut up a cardboard box, and gathered some odds and ends of yarn, together with a couple of bottles of school glue, scissors, and a pencil.

I made one with the girls, as a demo, detailing each step, as we went.
1. Draw a simple picture, lightly, in pencil, on a piece of cardboard (thick cardboard is good, because it won't bend, and loosen the yarn, once the glue is dry).
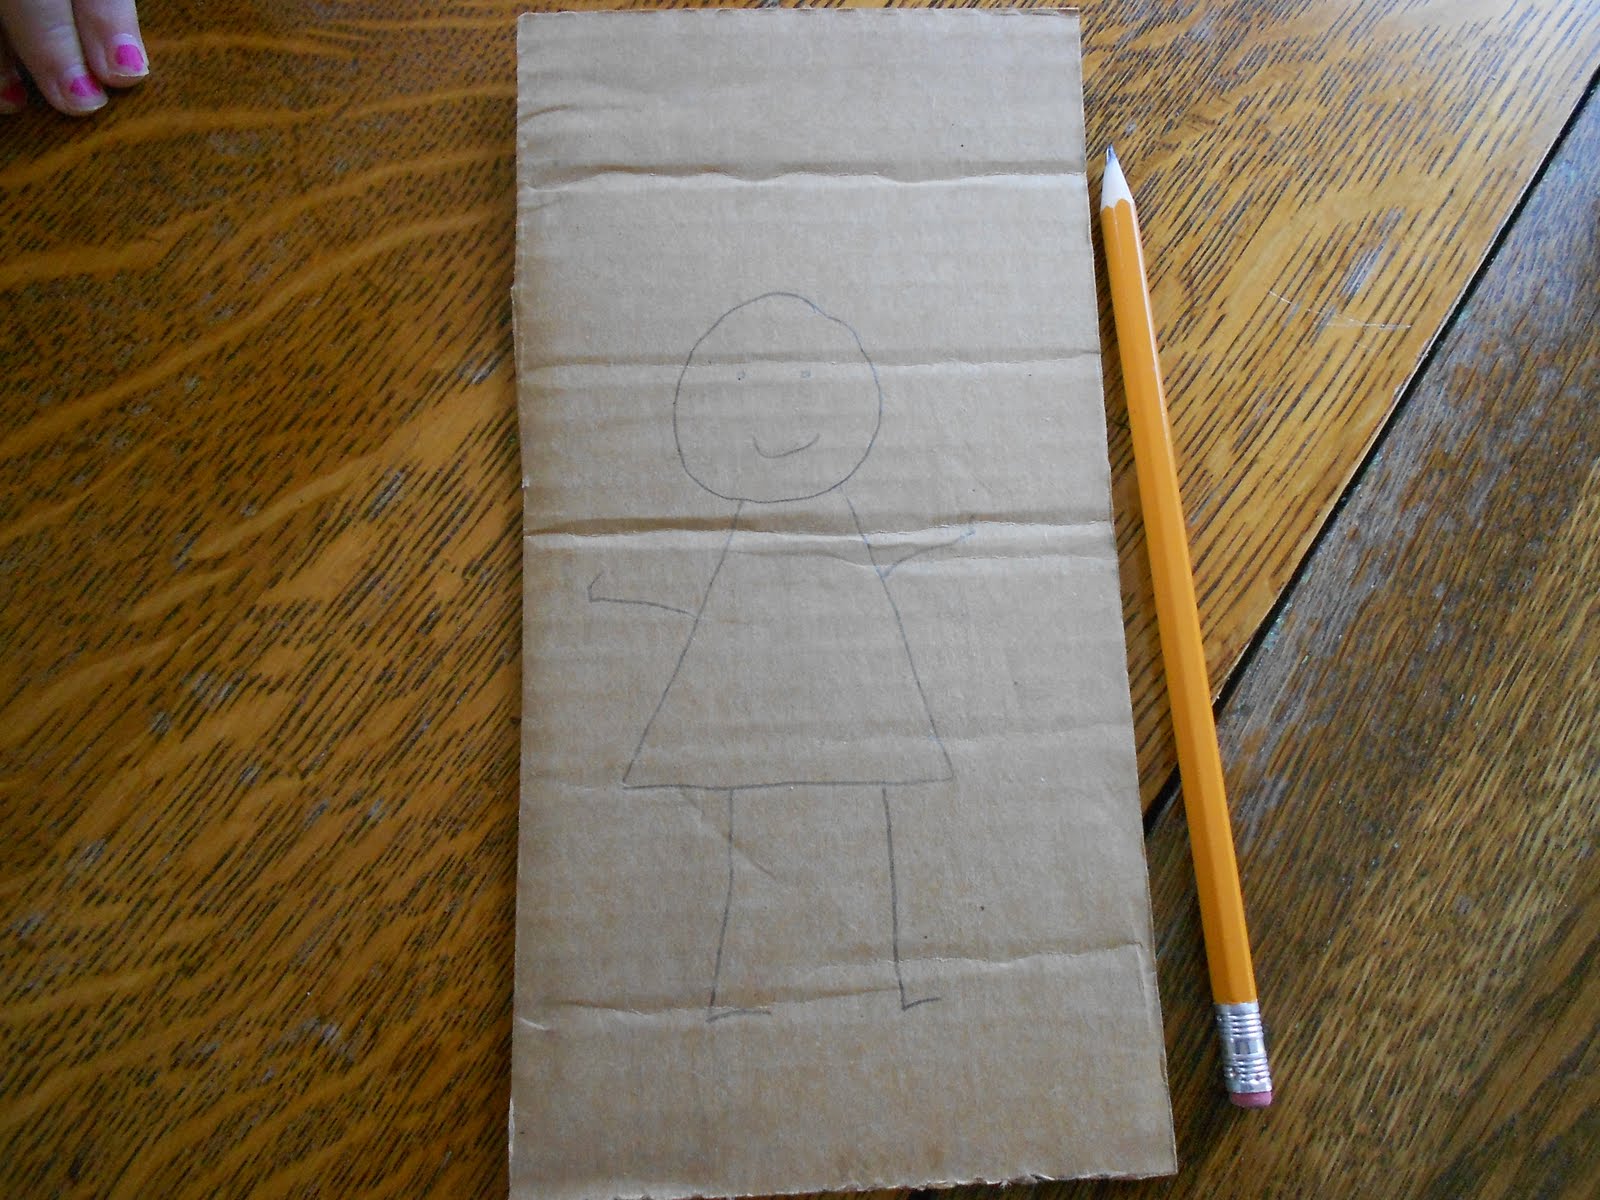
2. Outline part of the picture in glue. Only do one part of the picture at a time, so the glue doesn't start to dry, before you're finished.

3. Cover the glue with pieces of yarn. Lay, and press the pieces into the glue, trimming the yarn as you go.

4. When the picture is finished, set it aside to dry.

After the first one, I let them go on their own. I probably should have supervised the use of glue, to prevent waste - we ended up with at least one heart, that will still be drying next week. But, leaving the room was the only way to keep myself from jumping in, and "helping".


And really, at 5 and 6 years old, this project was perfectly doable for both of them on their own. They had a great time, gluing and crafting for well over an hour, visiting away like a couple of ladies at a missionary circle.

This might not be a good project for children who are phobic about dirty fingers (I have one of those, too), as it's quite messy. By the time they were done, the girls' fingers were covered in dried glue, and fuzzy bits of yarn. Happily, these two don't mind getting messy, and produced a large number of beautiful portraits and pictures of people, flowers, butterflies, and hearts.

It's great to be a homeschooler.
Subscribe to:
Posts (Atom)


