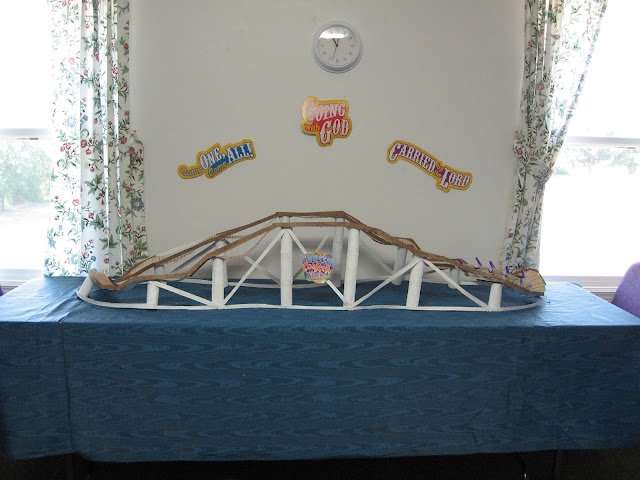
I've been working on, and off all week, putting together a cardboard roller coaster to use as the focal point for a VBS classroom. I wanted something that would be big, exciting, slightly functional (meaning I wanted the cars to really roll around it), and made out of supplies I had on hand around the house.
I started with empty toilet paper tubes (we always seem to have an abundance of those), masking taped together to form pillars.
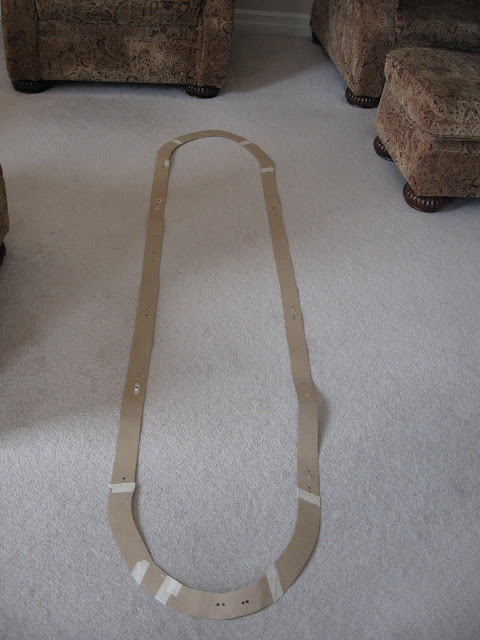
When I had the pillars arranged in an order I liked, I cut two inch wide strips of cardboard (I used recycled cardboard from packing material, but cereal box cardboard would work in a pinch) glued together to form a track base, that I could drape over the pillars...
...and fasten on with bread ties...
...first marking each side of where each pillar touched the underside of the track...
...to match up with holes punched on each side of the tops of the pillars.
I ran a bread tie, cut in half, through the holes, and twisted it closed underneath the track.
Then, I stapled a thin (1/2 inch wide) strip of cardboard along the bottom edge, perpendicular to the pillars, to help keep them straight, or straight-ish. I made the two straight sides of the roller coaster, then figured out how far apart I wanted them, and ran the small strip around one final toilet paper tube on each end...
...to make a curve. Placing cardboard sheets under the strip, I could use it as a pattern to sketch out the curve for the final pieces of track base...
...which I stapled into place, and then attached to the last toilet paper tube pillars.
Once the track base was complete...
...and used it as a pattern for an additional, smooth, layer of track, on which I drew rail ties for effect.
While the track was off, I stapled diagonal, cardboard strip, supports to the pillars, and painted them white.
When the paint was dry, I reattached the track base, using mugs to keep everything steady as I worked.
I glued the track on over the base, using clothes pins...
...to hold it in place while the glue dried.
And finally, I crafted a few quick coaster cars out of egg carton cups, and bendy straws, with bendy straw pieces hot glued on for head rests, and ties...
...and a small, straight piece underneath, for a toothpick "axle" to run through, poking through the center of the wheels (the very bottoms of more egg carton cups), hot glued in place (see picture above).
The wheels fit a little more snugly between the rails on the track, than I would have liked - a three inch wide track probably would have made for freer movement. But, the cars do roll...
...and the track survived a trip in the back of our truck to the church, so I'm pretty happy.
Whether or not our roller coaster will survive five days of 3rd and 4th graders, remains to be seen. But, if it does survive, the girls have big plans for a Lego man theme park.
It's great to be a homeschooler.


4 comments:
Wow, you have been busy. When VBS is done, I am sure you could get lots of physics lessons out of it. :)
You came up with this idea all on your own? I BOW to the Master... ;0)
Incredible! Even my husband was in awe :)
Very cool. I will be quite impressed if it survives 3/4 graders, they are very destructive from what I've seen.
Post a Comment