 It's not all that unusual for the Man of the House to take up toy making for the children. And, I knew he'd been watching my progression into the world of Popsicle stick houses with interest. But, I was somewhat flabbergasted when he returned from a trek into "the city" on an automotive errand, with craft supplies from not only Walmart, but Michael's, as well.
Even more astounding, was the fact he hadn't called me from either store, to see if their was anything else he should pick up...like polyfill, safety eyes, a skein or two of yarn...okay, so maybe it was just as well he didn't call, my list probably would have put a major dent into our post-Christmas budget. Besides which, he agreed to make amends by photographing his house building steps, and writing up a guest post, tutorial for me - which you'll find below.
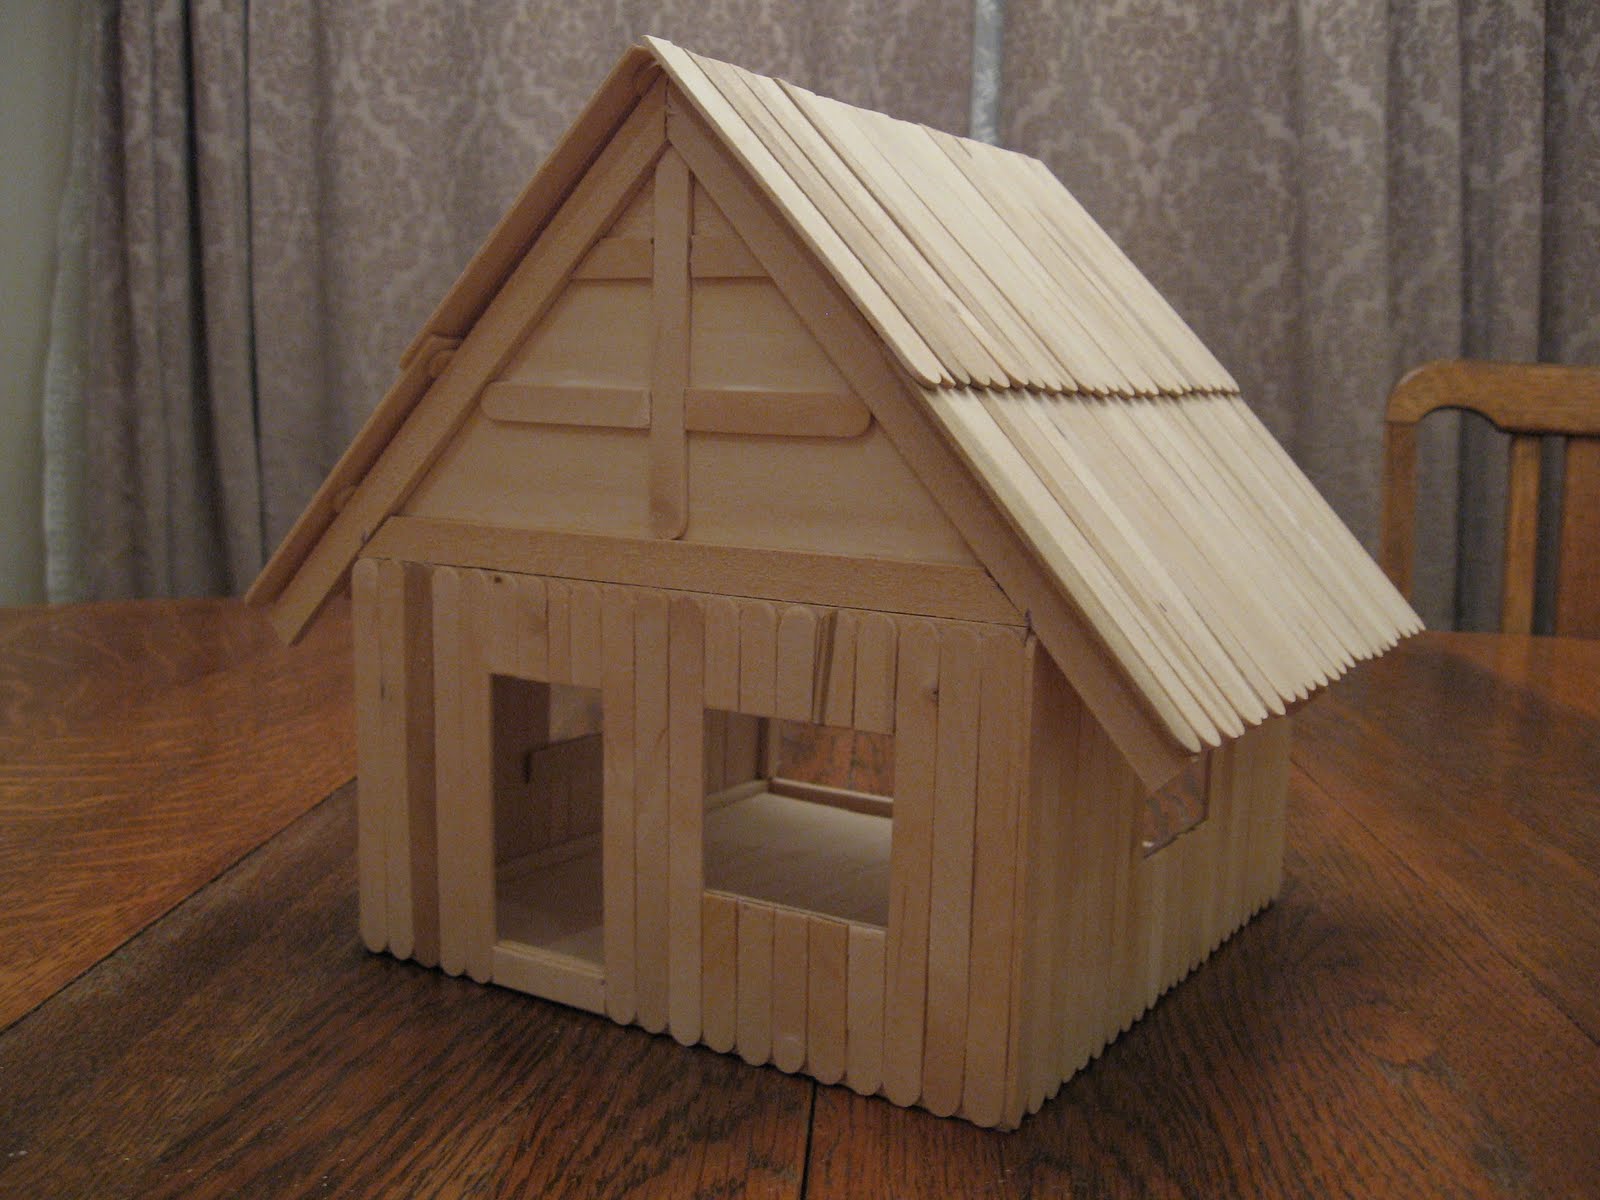
We do tend to approach projects from opposite ends of the organizational spectrum, as you can see from the side by side view, my latest house, next to his.

I hope you'll enjoy the temporary change of perspective.
After seeing the construction of a couple Popsicle stick houses built by the Lady of the House, I felt compelled to construct one of my own, done a little bit different with the addition of Basswood materials I found at Michael's Arts and Craft Store. Please follow along as I construct my own version of a little Doll Bungalow.
The picture below shows all the materials I used to construct my little doll dwelling. I must say the Basswood works fantastic for projects like this, it cuts, and carves like a knife to a bar of soap, and is fairly inexpensive at under $10.00 per bag, as shown here. One bag was more than enough to complete the project with materials left over.
 The first wall I constructed, I used 2 of the Basswood sticks spaced at the full length of the Popsicle Sticks as a top and bottom board, they were 8 inches long, you can see how many sticks were used and that I had to split one down the middle to get full coverage, in the following pictures you will see how I constructed the framework for the windows.
 In this lower picture you can see the frame for the window on the inside of the wall, the Elmer's Interior, Glue-All worked great, as it was very fast drying, and sticky enough when wet to keep my pieces firmly in place. You will want to choose your top, and bottom at this point to make sure your windows are constructed at the same height.
This picture shows the construction of the front wall, there are only three walls to this house so the girls can have access to the rear of the house for their dolls. The house dimensions front, side and rear are 8 inches square, wall height is the length of a Popsicle stick. In this picture I am constructing a front door opening and front window that is a little larger than the side windows.
 In this view, you can see my framing for the door opening, and front window, the dimensions used here were just eyeballed at this point, what ever looked correct I ran with and it seemed to work well. It's a guy thing.
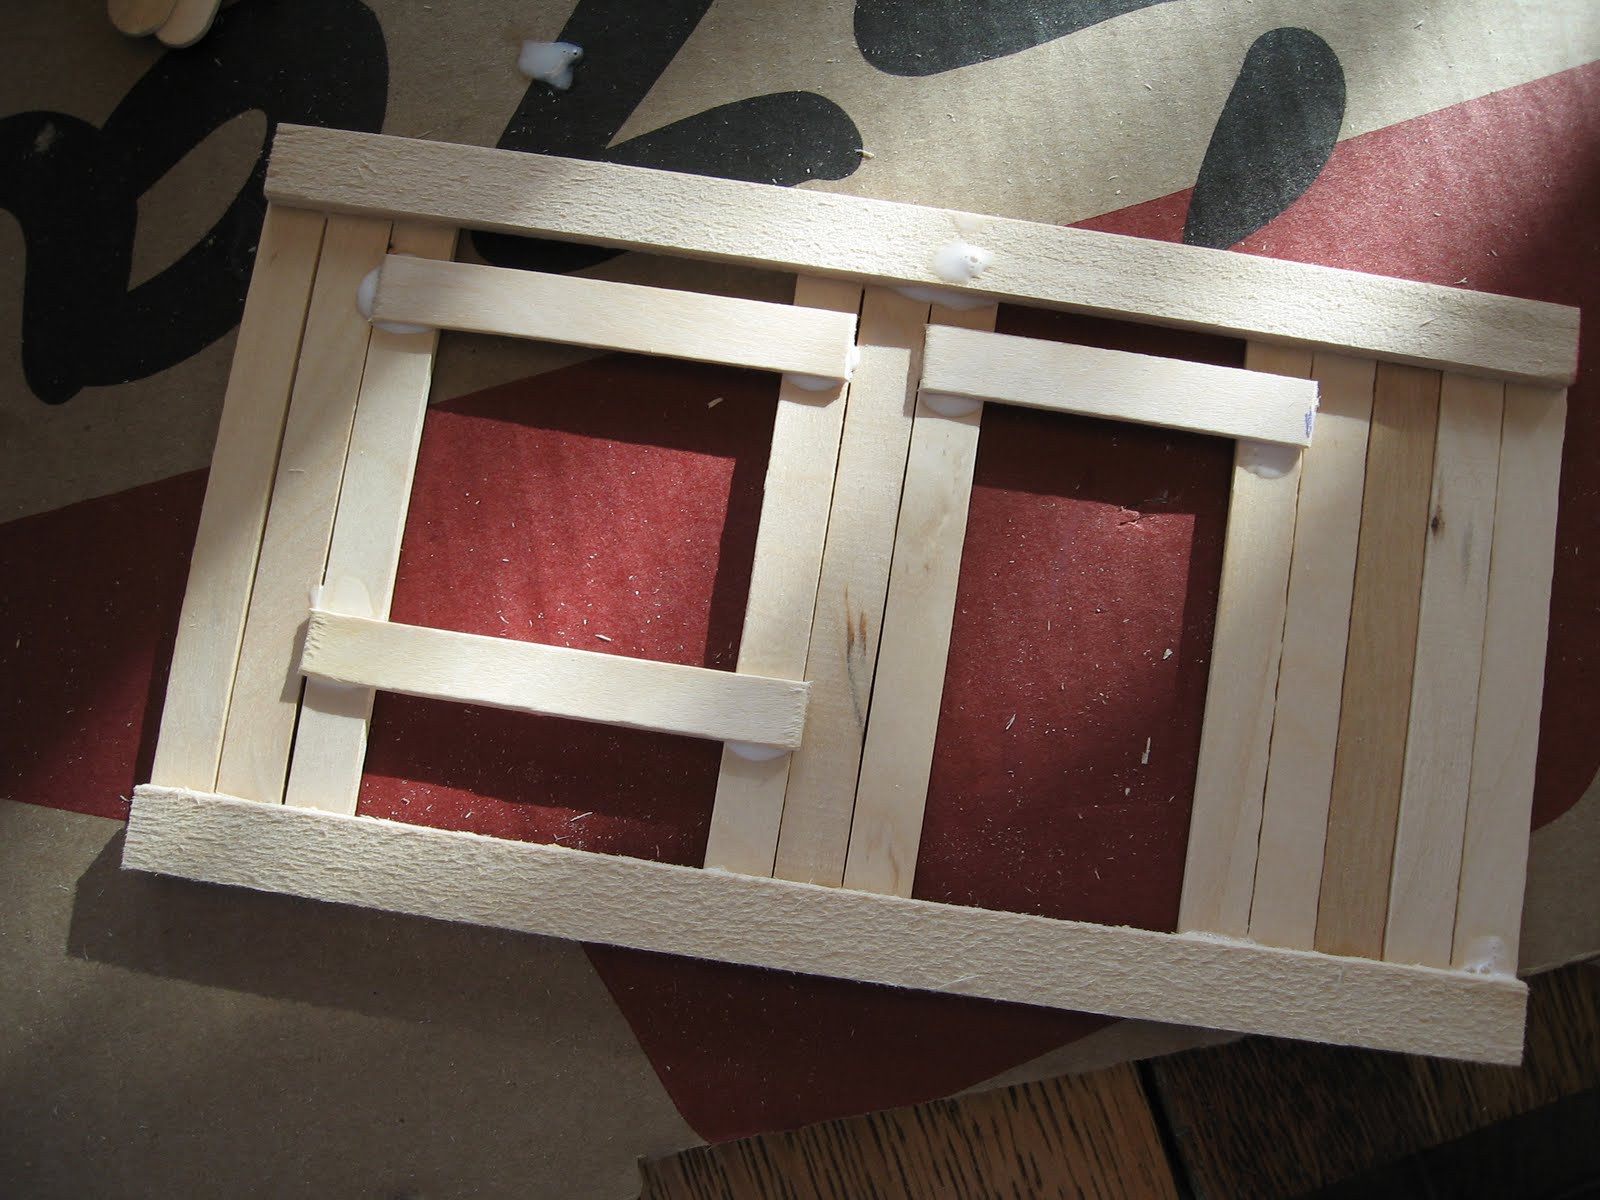 A flipped over view of the front, here I am about to finish the siding after installing the frame work, I had only left this alone to dry for ten minutes or so, the glue was drying very quickly.
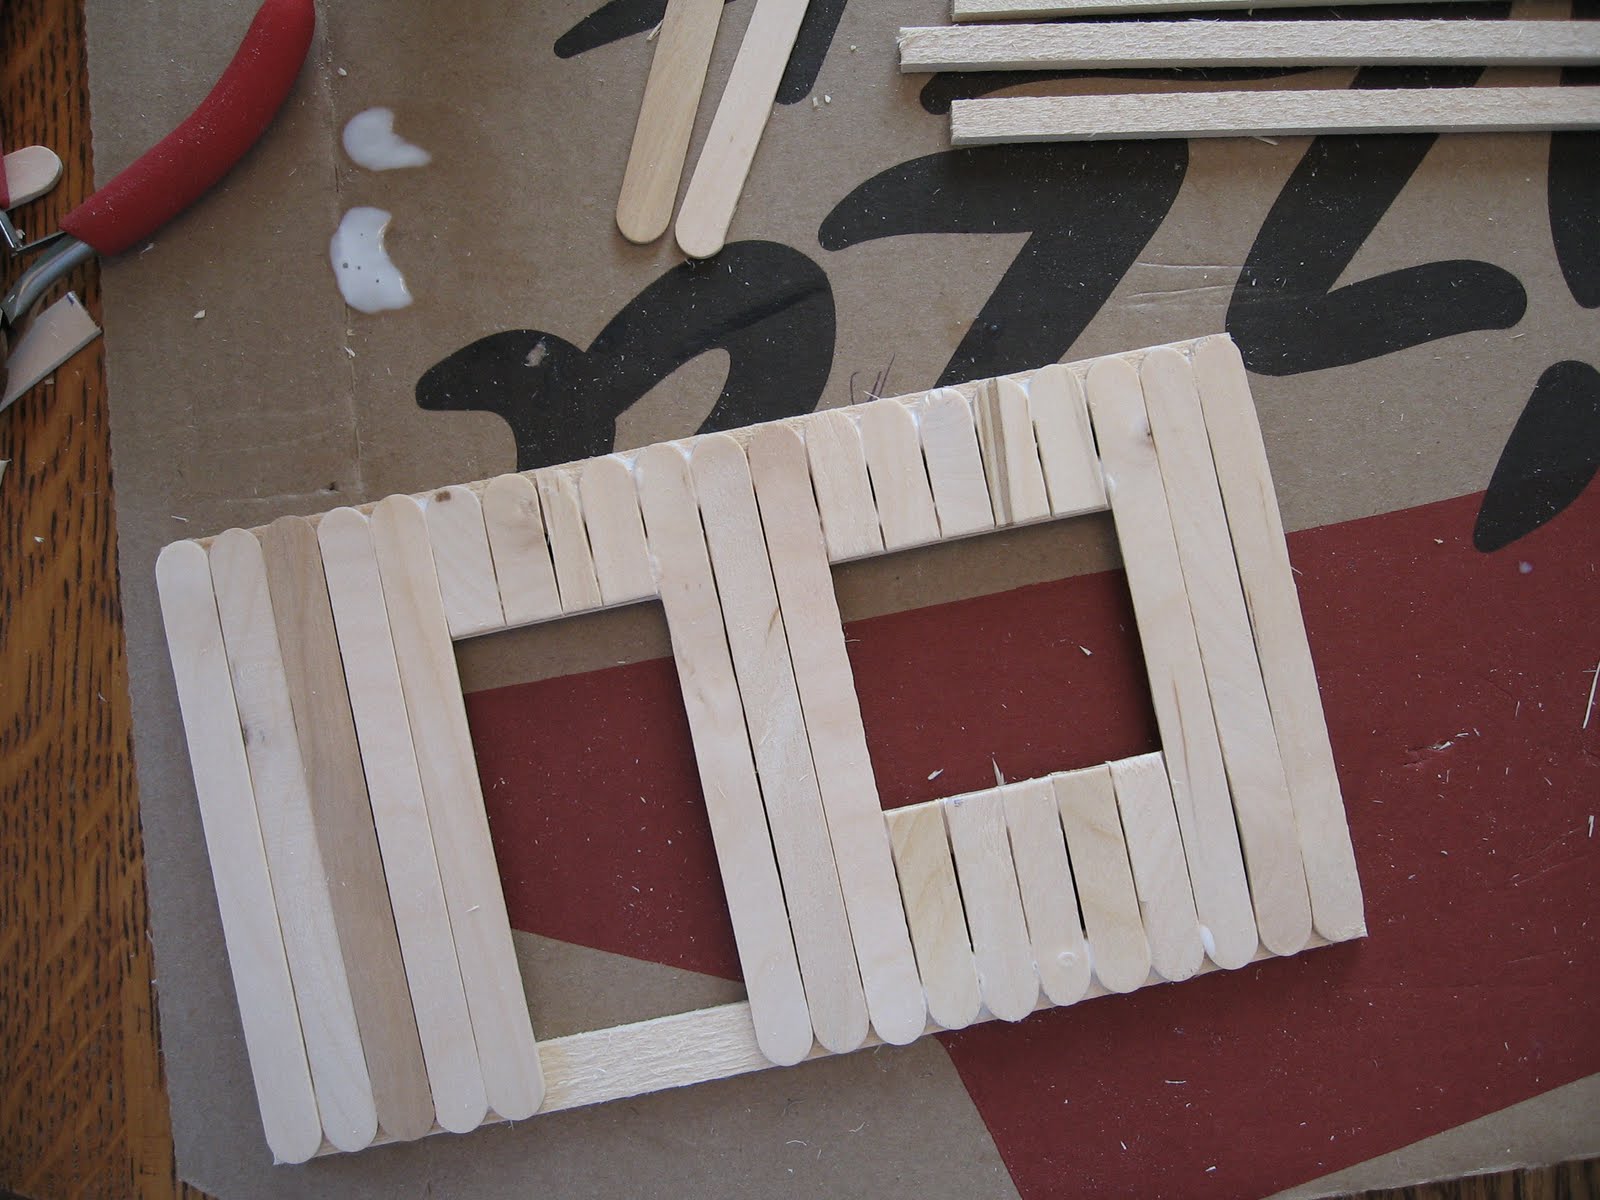
The finished front wall - from start to finish, each wall only took about 30 minutes, Elmer's Glue-All is fantastic!
Here I am fitting the walls to the floor. The floor is 8 by 7 and 5/8 inches, and is constructed with Basswood sticks, and small sheets of Basswood, that were included in the bag from the store, they worked great, just like a sub floor in a real house.

This is how I constructed the floor from the bottom side, any cutting, or trimming of the Basswood was easily accomplished with my razor knife, like I said earlier this wood is like cutting soap, very easy to fit just the way you want it.

Now, I have my walls glued to the finished floor, all went together very well, please note the back remains open for access.

This is another view, and at this point you will want to make sure your walls are even along the top, this will make mounting the upper floor, and roof trusses much easier, and keep their alignment true.

Here is the challenging part, I took two Basswood sticks the same measurement of 8 inches, and laid them flat at a 90 degree angle from each other, with one end lying on top of the other end. I traced with a pen, making a square. I then drew a line corner to corner making a 45 degree angle for the pitch of my truss. Make sure the other stick's angle is opposite, so when glued they make a triangular truss.
 This is the finished product, two angle cuts to form my truss, I know this seems like it's being over engineered for a doll house but it's a guy thing.
Stay with me now, you will need to construct 3 sets of these for the roof.
 In this picture you can see I have cut small triangles to help support, and strengthen the truss, don't make them too large, or they will be in the way of little hands.
This is what the finished truss should look like.

In this picture I am cutting small pieces to be mounted on top of the walls, in between each truss for support, and to fill in the gap, you will see later how it will look.

This is how it will look, please note the gap cut in the middle for the center truss. Later, I will add a second stick on top of the first ones to add more support and help the roof fit better. There is an official name for these boards in the construction world, but it escapes me at the moment.

Here I am fitting the center truss, getting it mounted dead center, and level so I can make marks on either side, the marks will help me mount it correctly when glue is applied.

Wait a minute! I almost forgot to get the second floor loft framed in, and glued down, the next few shots show how I made that all possible.

Please make sure, that your framing is straight, and level, or else the Popsicle stick floor will look like a roller coaster.

The floor went on very well, and measured out just right with an even amount of sticks. Along the front wall I did cut the rounded ends off so they would mount flush.


Alright, back to the trusses. See, here I am using a ruler to make sure the truss is mounted dead center as it spans over the walls. Here is where I will make my marks to make it easier when the final gluing is done.

The pen is pointing to the marks I made.

The first one is glued, and placed in the middle. It went on without any problems.

This is the front truss. I am cutting Basswood sheets to cover it up, for my siding later on.

Here, I have mounted the second row of sticks for added support for the trusses, like I said earlier, there is a correct term for those boards.

Now, the front truss; make sure they line up with one another if you try this, making the measurements, and marks earlier, made this easy for me at this stage.

Now, the rear truss; it's looking more, and more like a doll house. Please note, that after I placed the three trusses up, I let it sit over night to dry. I didn't want to risk knocking them down, while trying to place the roof sticks on.

Here I am placing Popsicle sticks along the top, middle and lower end on each roof slope, these will serve as my mounting surface for the roof which will be two rows of Popsicle sticks. I did have them overhang a little bit, on the front, and back to give the look of an eve.

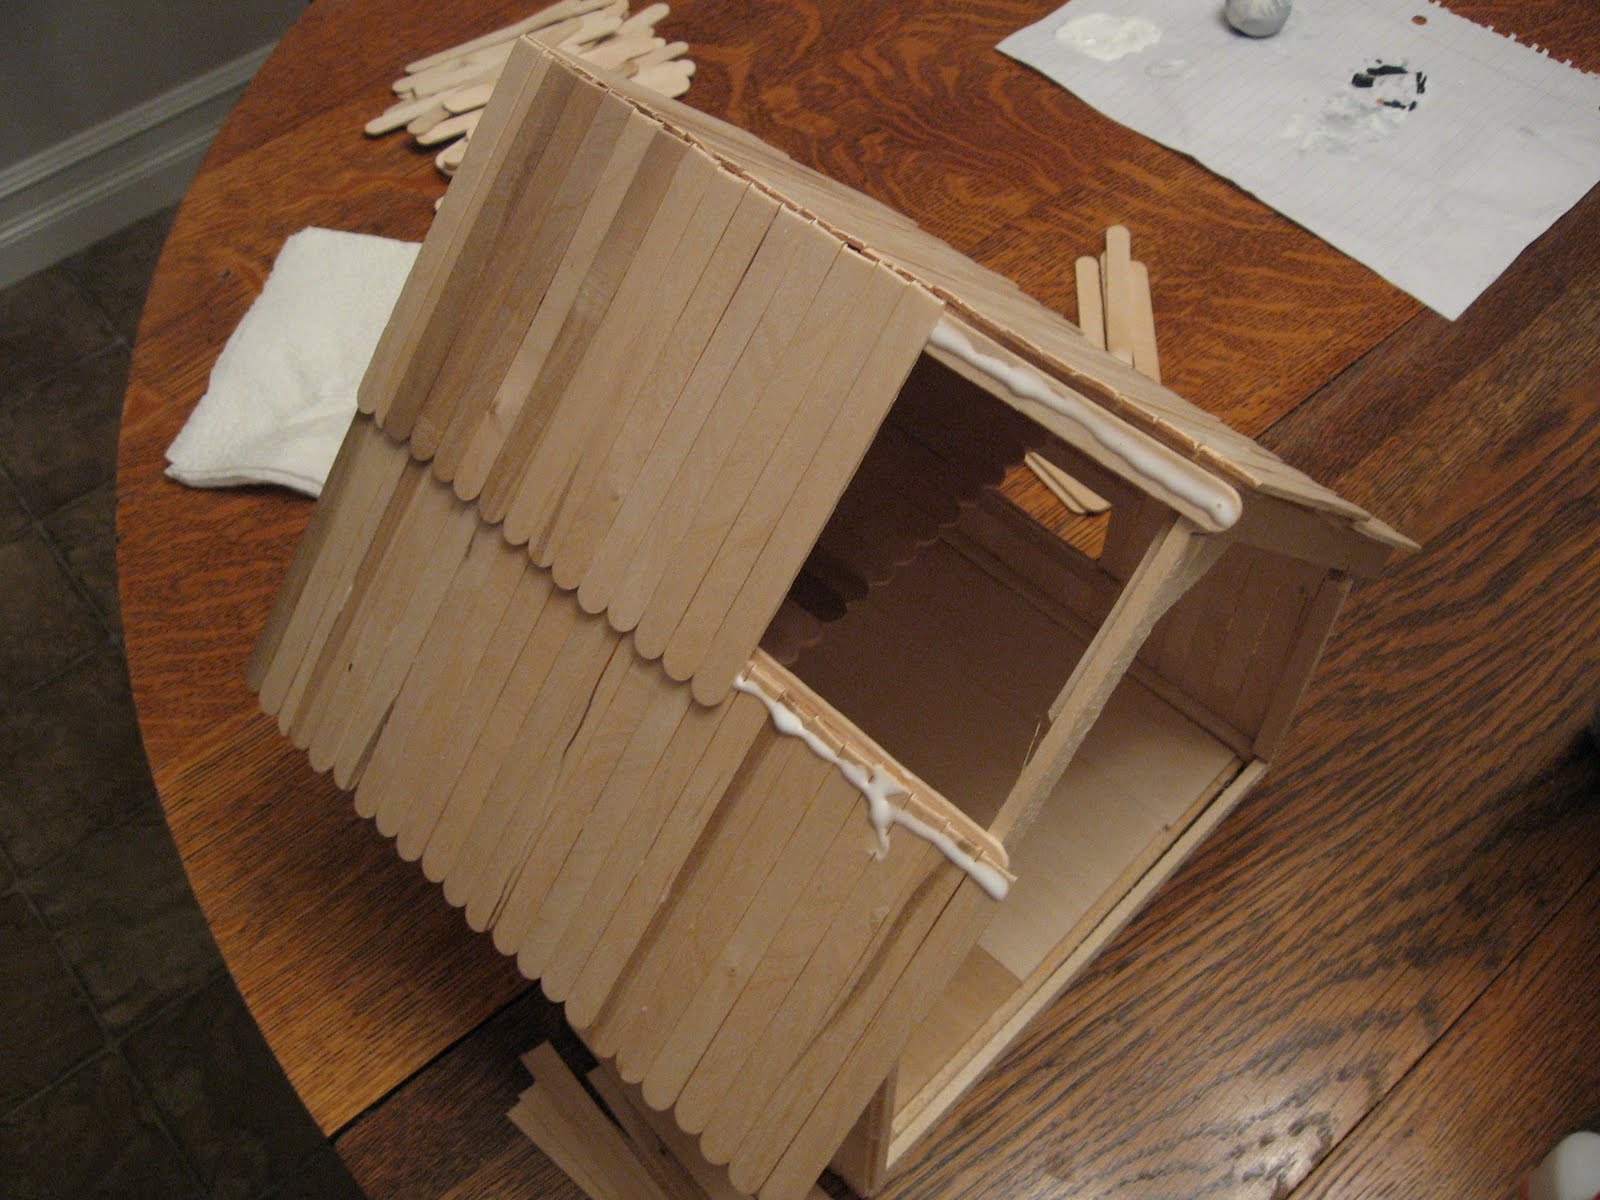
Time for the roof, I did the bottom row first, and on the upper row overlaid the sticks for a true shake roof look. Please note I did split one stick on the top, and bottom, so that the sticks would be staggered, you can see by the pictures what I am talking about.


I repeated the same, on the other side.
Almost done, I need to do some work on the front, and get a ladder made for the loft.

Here I am cutting, and fitting a stick, that will help frame the lower end of the gable.

It was a perfect, well almost perfect, fit.

This picture is some small trim pieces I cut to mount to the front gable wall.

Here I am constructing the stairs for the loft area, this took some carefull cutting.

But, it worked out just the way I had hoped, with the ladder functioning almost as stairs.

Here it is, the finished product, ready for carpeting, and paint. I'll leave that step to the children.


As the Lady of the House likes to say, it's great to be a homeschooler.


25 comments:
I LOVE IT!! Way to go D!!! My man would be so proud. I'll show it to him tonight.
That is quite an impressive tutorial and it is only my failing to be unable to follow it entirely. (It's a girl thing.) Very cool.
Thank you for the tutorial. Your little house turned out so wonderful. Any little girl would love to play with their little dolls in that.
I showed it to my Man of the House and he was properly impressed. Great house, and it's so neat to see a guest post from your Man of the House.
Slightly different than our penguin bungalos we made with entirely too much hot glue and not an ounce of measuring. . . . .Love it! You've brought popsicle sticks to a whole new level! I'll show this to oldest son and see if he gets excited. :)
I love the guest tutorial. The house is fantastic! Something tells me that the man of your house is much handier than the man of our house!!!
Fantastic house....I should say houses!!
VERY impressive!!
Okay, wow! That is an impressive tutorial, I usually forget to take pictures at different steps.
What a great tutorial! Please give our thanks to your Man of the House.
Great house. Brings back many memories for me. When my grandfather was alive he built many popsicle houses. He would paint them and glue on all kinds of small plastic figures, animals, etc. to bring the houses alive. Thanks for sharing yours with us.
Blessings
Diane
This is so fabulous! It's on e of the things I always wanted to do with these sticks when I was little- but I didn't know how! Thanks so much, I'll be linking to this.
Go Big D!!! Awesome! Those architecture classes in high school finally paid off! Big A and Bigger N are impressed too. Little N hasn't seen it yet. She's going to want one.
I'm Impressed beyond belief! I'm forwarding this to my man of the house!
I love this so much and am so going to make it. Thanks for the great tutorial!
love your house, have been looking around the net for ideas as I am trying to remember a house I built when I was young and try and replicate it for my daughter... thanks fo rthe great tutorial
That is absolutely amazing!
This is super cute house :) I love it...
timber adelaide
wow !!! its so cool ..
I've never seen anything like this before! This is amazingly wonderful and creative. Thank you for sharing this. Awesome and perfect for the kids. We also did a Popsicle Stick Kazoos out of the same materials you used. You should check this out!
EarlyLearning.Momtrusted.com Popsicle Stick Kazoos
Great idea nice work!!
First, I will say that I found this tutorial helpful. Because I did. Great work, very well organized.
By wow is it annoying to be beaten over the head with the fact the writer is a guy. And no, over-engineering is not a 'guy thing'. Nor is 'running with it'. We get it, man. You're male. Alpha, and very manly despite having had bravely ventured your very manly self into the estrogen-fogged abyss of Michaels. You just strutted in there, heedless of what was sure to have been a social stigma exceeded only by the task of being forced to purchase tampons, and triumphantly chose the necessary tools to build this very manly dollhouse. You're admirable--nay, a hero among alpha men--and we're all suitably impressed that you took the time to teach us how to do this, and with only a medium amount of alienation. So thanks for that, I guess.
No one cares what's between your legs, we just want to know how to make a popsicle house.
Jeez.
Glad you found the instructions helpful - sorry to over-identify the gender of the author. We were really just having some fun with my regular readers at the time - introducing a guest poster - and mixing it up a little.
The DIY Popsicle Stick House is so cool. Featured you on Diy Popsicle Stick Bridge Designs And Tutorials
I am on the trusses right now and I'm feeling a little nervous..I didn't really understand your floor. I didn't know if some of the frame out of the basswood strips was suppose to be showing,so I did my frame and subfloor a little different..plus my walls didn't meet edge to edge..I may have to figure something out for more stability once I get it all put together..I made my loft out of a basswood sheet also. I was into to cutting each popsicle stick and mine kept splitting when I was cutting them..keeping my fingers crossed it will all work out when I get the roof on..might I also add no help from hubby..did this all by myself..thanks for pretty much the only step by step tutorial on the web that made any sense..
Post a Comment