
 We found the idea for this fun summery project (we've decided we've had enough of the cold, wet spring, and are steaming straight on into summer), in Jane Bull's recycling craft book, Make It! It's one of a number of intriguing projects using materials out of the recycle bin.
It was our first attempt at weaving fabric strips, but it turned out to be easy, and fun. It's a great project for using up all those last bits of fabric, or even for recycling old t-shirts.
Start with a piece of cardboard, slightly larger than you want your place mat to be. It should be sturdy, corrugated cardboard, and not the flimsy stuff I have pictured - we switched midway through our project. On the short ends - the ends farthest apart, cut an even number of slits, every 1/2 inch.

 Cut your fabric, or t-shirt into 1 inch wide strips. For this part, it's best to use only one color of fabric.
Tie the strips together into one, very long strip. The length you need, will depend on the size of your place mat, but you can always tie on more strips as you go, for additional length.
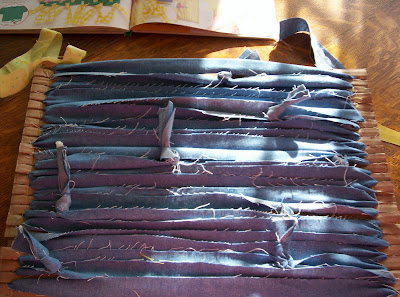
Slip the end of the strip into the first slip, with a couple inches hanging loose. Then thread the strip through each of the slits, wrapping the material around both sides of the cardboard. This is called the warp.

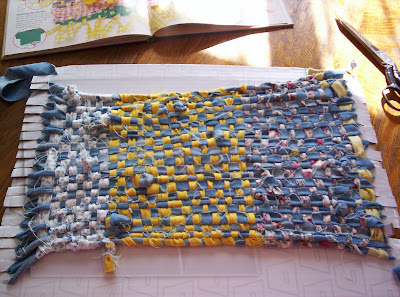
 Cut additional, inch wide strips of fabric, of various colors. Weave them through the warp, in an alternating over, under, over pattern. Pull the strips all the way through, before starting back again, leaving a little bit at the beginning to weave back on itself, to keep the fabric in place. Tie additional strips of fabric on, as you go, and continue weaving until the entire front of the cardboard is covered. Weave the last bit, back on itself, to keep it in place, as well.
It will look something like the this on front...
And, something like this on back...
Cut the back, warp strips down the middle.
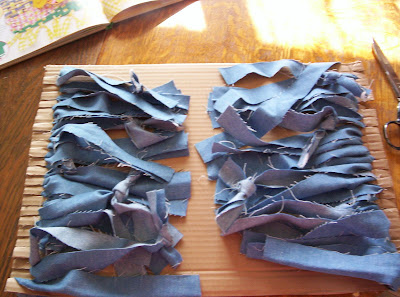
Slip the warp strips off of the cardboard, and tie them in pairs. Then trim them to even lengths, and you're done - all ready for a light, summer lunch

It's great to be a homeschooler.


8 comments:
I like this. I was thinking the other day, that someplace I have a little weaver set for making pot holders and was thinking I should get the stuff to let Selena play with it.
I love this project! This is great, and just what I was looking for. Thanks for posting this.
-Phyllis
Oh what a fun idea! Thanks so much for this, I'll be linking.
I bet you could use yarn for the warp also.
I remember doing a unit on weaving in college in my art class. It was so cool to do.
This is fantastic! I love it!!! I'm going to have to get my hands on that book too. Fun!! :-)
What a great project.
Blessings
Diane
I just love this! Thank you so much for sharing, and for telling about that book - I have to find it! This is so simple and the result looks so nice. :) I bet this would make a good preschool 1st weaving activity... maybe making the slits a bit farther apart... and not caring about the look of the finished product of course. ;)
I've been looking for this pattern since I was in 3rd grade! Thanks for sharing!
Post a Comment