Monday, September 30, 2013
A Skip Counting and Fancy Nancy Vocabulary Apple Harvest
I decided to slip in a couple of last apple themed lessons for my youngest, before turning the page on the calendar to pumpkins and the like. It was super simple with the help of a "count by fives" apple printable from Doodle Bugs, which I cut out and paper clipped to our fall leaf list tree...
...for C to harvest and place out in order on the table, as she counted by 5s.
Then, I reset the tree for a Fancy Nancy vocabulary, pick and match-up, activity using an apple template from dltk-kids.com, modified in Paint to add the vocabulary words...
...and their definitions from...
...the back of Jane O'Connor's Fancy Nancy Apples Galore.
It's great to be a homeschooler.
Friday, September 27, 2013
Apple Stamp Learning - A Fall Mini-Unit
As a reward for helping me pick the last of our apples, and as a way of using up the "good" half a few the birds had sampled, I covered the table in butcher's paper...
...and poured fall colored paint onto paper plates...
...for the girls to use for apple stamping. They had a great time decorating the table. And, as a bonus, their artwork turned out to be a pretty good backdrop for a lot of learning the next day...
...when the children labeled the different colored apples in the languages they are studying giving us a chance to discuss adjective placement and gender agreement.
When they got tired of that, they switched over to each child counting all of one color of apple (with T double checking the totals)...
We switched gears, and brainstormed adjectives describing the different colors of apples (ie. common for red, sour for green, sweet for yellow, rotten for brown, unnatural for orange, and so on) printing the words out in matching colors of crayon to the apples we were describing.
It's great to be a homeschooler.
Sunday, September 8, 2013
Two Piece Cardboard "Slip Together" Playhouse
I have to thank Crafty Crow and Lilla A for inspiring the perfect project for using up a couple of large pieces of packing cardboard the Man of the House brought home from work. A quick Internet search proved I wasn't the first person to think of enlarging a slip-together dollhouse design to accommodate children. But, since everyone has a little different approach to a project, I'll give you my step-by-step anyway.
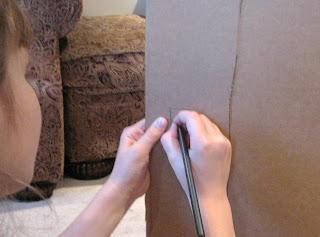
I started with two large pieces of sturdy cardboard - just about 5' x 4'. Measuring out from the center of the top of each of the pieces, to spots about a foot and a half down the sides, I trimmed off the top corners, with a razor blade (protecting the table underneath with additional cardboard), to form roof peaks.
I cut a slit halfway down from the peak of one piece, and halfway up from the center of the bottom of the other piece...
...so the two pieces would slip together to stand.
Then, I slipped them back apart to make it easier to cut out doors...
...and a window...
...super simple, and ready to decorate.
It's great to be a homeschooler.
Friday, August 30, 2013
9 Piece Square Puzzle Cookies
Gearing up for "school", we've been playing with a number of geometry/logic/spacial reasoning puzzles, like Thinkfun's IZZI© puzzle shown below.
In fact, that particular puzzle was the inspiration for yet another cookie project. Staring at the black and white squares, I just couldn't help but be reminded of chocolate and vanilla cookie dough, and finally couldn't resist baking up a couple of cookie puzzles to add to the game table.
The 64 black and white IZZI tiles were a little more project than I wanted to take on just now (maybe this winter). So, I settled instead for a 3x3 square style puzzle, like I've made out of cardboard for the children in the past.
Half a batch of sugar cookie dough (click here for the recipe) - with half left plain vanilla, and half with baker's cocoa added...
...is enough for two puzzles rolled 1/4 inch thick...
...and cut to be 4 and 1/2'' square.
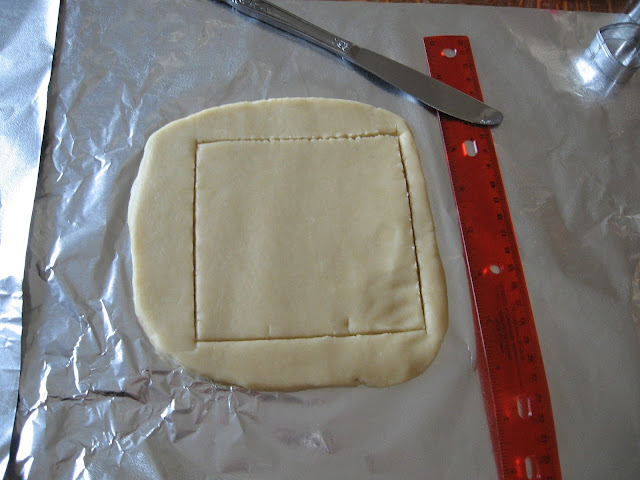
Transfer the cut squares onto a large, greased cookie sheet, and then score the dough to divide each square into 9, 1 and 1/2'' squares.
Use tiny cookie cutters, or cut geometric shapes out of each square with a butter knife, crossing the scored lines in a pattern (so below the bears are all cut in half at the arms in the middle of squares, and the hearts are divided into quarters by the corners of the squares).
Pop the cut shapes out, and swap them with pieces of the alternate dough cut from the other square, or from the leftover scraps.
Finish cutting the small squares apart along the scored lines. Spread them out on the pan, using a ruler to double check they are all still 1 and 1/2'' square.
...and challenge children...
...to solve the puzzle (with clean hands, of course)...
...before eating the cookies.
It's great to be a homeschooler.
Saturday, August 3, 2013
Summer Fun Day 70 - Turning the Computer Off
It may be only early August, but in our little corner of Montana the mornings are already growing chilly.
The apples are nearly ripe...
...there are southward flying geese in the air...
...boxes of books are arriving at the door...
...and the first yellow leaves are beginning to dot the lawn.
It may not be fall just yet, but it's clearly coming around the corner - and we haven't even had our annual family water balloon fight. With time short, and so much we'd like to do, I'm back point of "do it, or blog it". Choosing the former, I'll be stepping away from the computer once again, and moving back to a more sporadic, now and then, school-year blogging schedule.
See you in the fall!
It's great to be a homeschooler.
Friday, August 2, 2013
Summer Fun Day 69 - Gummy Belly Bear Cookies
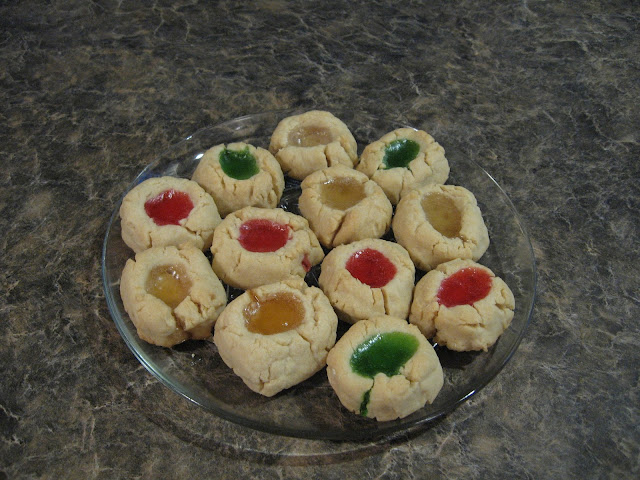
Using fruit snacks instead of gummy bears in our popsicles left us with plenty of bears for trying out The Baking Robot's gummy bear thumbprint cookie recipe.
The cookies turned out to be buttery and delicious, though not nearly as pretty as The Baking Robot's, and not quite as much fun as we had hoped. The cookies were good, but we missed the bears.
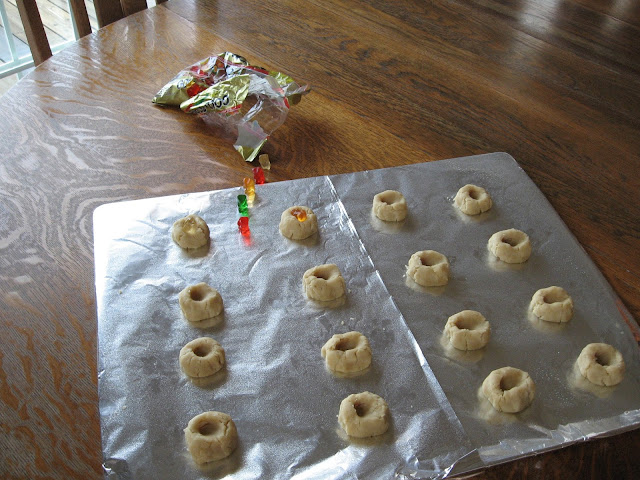
Happily, that problem was easily rectified by adding a few extra balls of dough to each cookie...
...before baking.
One Tip: It's best to let these cookies cool completely before moving them from pan to plate, or they might just loose their heads in the excitement.
It's great to be a homeschooler.
Thursday, August 1, 2013
Summer Fun Day 68 - Multi-Shot Marshmallow/Pom-Pom Poppers
Usually, marshmallow poppers are made with paper cups, and are single shot (click the link for instructions, and remember to keep balloon pieces away from small children). It turns out you can replace the paper cup with a less expensive toilet paper tube, as in the un-decorated prototype below.
And, if you like, you can tape several balloon topped poppers together for a rapid fire, multi-shot action.
Or, tape three tubes together...
...and top them with one large balloon top stretched over the cardboard core of a tape roll (test it first to make sure the ring is large enough to fit around the tubes)...
...for a quick...
...single pull...
...multi-barrel burst.
It's great to be a homeschooler.
Subscribe to:
Posts (Atom)


