Saturday, November 27, 2010

Glittery Snowflake Window "Clings"


We enjoyed our snowflake "clings" so much, last year, that we decided to make up another batch, this weekend. You can click here, for a step by step, on making, hanging, and taking them down.


We made them in the same way as last year...


...but, this year, we sprinkled them with glitter, before they dried, to add a touch of pizazz.


The glitter makes a fun (if risky) addition, because now the older girls can design the snowflakes, and their younger sisters can sprinkle on the glitter, being involved, too. And, they are quite pretty, sparkling in the windows.


It's great to be a homeschooler.

Friday, November 26, 2010

Snowman Egghead Planters

Our first order of business today, after taking down all the turkey decorations, was to redress the egghead planters.


I pre-cut all the paper pieces...


...and made hats, just as for the scarecrows...


...for the girls to use, to decorate new toilet paper tubes.

As they transferred the eggs, from the Thanksgiving, to the snowman outfits, I helped them trim back, and water the grass, before pulling it through the black hats.

Now, we're all set for another season.


It's great to be a homeschooler.

Thursday, November 25, 2010

Simple Snowman, Picture Frame, Chirstmas Ornaments

After the children went to bed tonight, I started working on this year's special Christmas ornaments. It's time to hit the ground running, after all.

I really like our fun foam, gingerbread men, from two years ago...


...and so decided to return to fun foam this year, but with a snowman theme.


To make them, I cut four circles out of white foam - 2 small circles, about 1 and 3/4'' in diameter, one medium circle, about 2 and 1/4'' in diameter, and a large circle, 2 and 3/4'' in diameter. I cut the center out one of the small circles, to make a ring, and cut two, brown, fun foam arms, and three, black, pieces of coal.


I printed an 8x10 picture from today's Thanksgiving dinner, and cut out the children's faces from that...


...gluing them onto the small circles...


...and then topping them with the ring frames, before gluing the rest of the snowmen together.


Once they're dry, I'll be able to use a needle to poke a hole near the top for a hook, and they'll be ready this year's tree, even if I'm not quite.

It's great to be a homeschooler.

Linked to the Toddler's Magic Christmas - Idea Bank, at Best Toys for Toddlers.

We Gather Together - A Thanksgiving Song for the Grandparents

This is just a quick Thanksgiving hug, for the grandparents, we couldn't be with today.


So again, from our house to yours - Happy Thanksgiving to all of our American friends, and family. And, Happy Thursday, to those of you in the rest of the world.

It's great to be a homeschooler.

Tuesday, November 23, 2010

Snowflake Turkeys

Neither snow... ...nor sleet...

...nor early Santas...

...at the mall...


...are going to...

...distract us...

...from Thanksgiving...

...this fall.

But I have to admit, it's looking more like Christmas outside our windows, right now!

I'll be stepping away from the blog for the next few days, to prepare Thanksgiving, and to take a few extra minutes for shoveling the walk...I mean enjoying the snow, with the children.

So, from a very white, and windy corner of Montana - Happy Thanksgiving!

It's great to be a homeschooler.

Monday, November 22, 2010

Frozen Soap Bubbles - Winter Fun For Kids

Did you know that soap bubbles blown outside, on a really cold day will freeze, right before your eyes, as they float by?

Naturally, none of the 1000 shots of bubbles I snapped, captured the transformation. Here's one blurry one with the feathery ice beginning to form. It starts as little stars, and then fans out to encase the entire bubble.


It really is a beautiful sight, like a mixture of snowflakes, and Christmas ornaments. Click here, to see some excellent pictures on the SeaWayBLOG. When they pop, they burst apart, like deflated, icy, balloons, and the paper thin sheets of ice, drift slowly to the ground.


It's a lot of fun, if you can stand the cold. I'm not sure how cold it needs to be. We were at about 0 degrees Fahrenheit, yesterday, which worked perfectly, for blowing them the traditional way.

You have to blow the bubbles up into the air, so they have time to freeze, before they hit the ground. Our first few, were warm enough inside, that they just kept going up, and up, into the freezing sky.

You warm weather people are out of luck, I guess, unless you can talk your local grocer into letting you blow bubbles in his walk in freezer. For those of you in colder climates though, it's one more thing to be thankful for.

It's great to be a homeschooler.

Sunday, November 21, 2010

How To Make A Letter "E" Pinata

It's birthday time at our house, again. Which means, it's time for another pinata (please pretend the n has the little squiggle over it). Our theme, this time, is Fans-E, our nod to Fancy Nancy, but personalized for E.

To make a letter "E" pinata, fancy or otherwise, you need:


  • One Pop Tarts box. You could use any thin cardboard, but a Pop Tarts box works especially well.
  • A few sheets of newspaper.
  • A few sheets of white, scrap paper.
  • A few sheets of tissue paper, in colors to match your party.
  • Watered down glue (about 2 to 1, glue to water).
  • A ribbon, or string for hanging.
  • Tape.
  • Candy to fill the pinata.

If you are using a Pop Tarts box, start by flattening it, and cutting it in half, as pictured.


Slit one side open, on each piece, and fold the lid pieces out, and tape in place, to make "L" shapes.


Fold, and trim the long sides of the "L's", to make the middle of the "E". This might sound confusing, but look ahead at the pictures, and hopefully it will make sense.


Trim a small piece out of the top, and bottom of what will be the middle of the "E", so the candy can get through. Use one of the scraps of cardboard, you just cut out, to tape the two box pieces together, to make the complete "E".


Flip the boxes over.


The cardboard is now making up two, of the four sides, of your "E". Dip strips of newspaper into the watered down glue, and drape it over the cardboard, to cover the two sides, and make a third. Gravity, will help the third, newspaper side, hang straight, until the glue dries, and stiffens.


Allow to dry completely - usually overnight. Then, flip it over.
Cut an opening in the top, big enough to fit your candy through. And, poke holes on each side, near the top, to string the ribbon through, for hanging.


Cover the final side, by draping glue covered, strips of newspaper across the opening.


After the newspaper dries completely, cover first one side, and then the other (after the first side dries), in a layer of white paper strips, dipped in the glue.


While the glue is still wet on each side, stick on the tissue paper layer. We went with stripes.


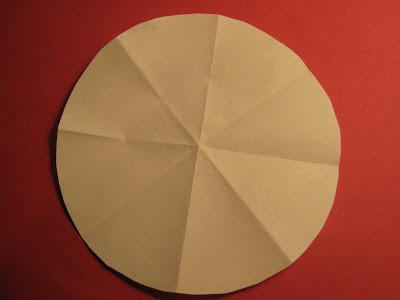
Follow up with any additional finishing touches. In our case it was tissue paper flowers...


...and a fancy, fringe along the bottom.


Fill the pinata with candy, and glue tissue paper across the hole.


Hang your pinata, where it can serve as a party decoration until it's time to bash it open. And, don't forget, no matter how pretty you make it, it will be bashed open. So, all of you, type "A" personalities, try to remember, that this is one time perfection is not really called for - just don't forget the candy.


It's great to be a homeschooler.