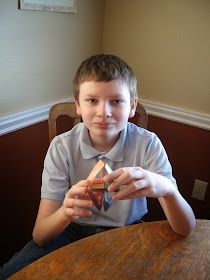
A friend forwarded us a link to a YouTube video with instructions to make one of these fun paper toys. It starts out looking like a row of triangles...
...but taken in hand, it can be twisted...
...and flipped...
...and turned into all kinds of different shapes and designs.
It looked like a nice distraction for a day New Years Day afternoon, when we were all too sleepy to do much else, so we decided to try our hand at making one. The instructions in the video are simple, but go by quickly.
I made up a set of instructions of our own, so if we decide to make a second, or third triangular toy, we can go to it without all the rewinding, and pausing.
The video instructions also start off with a single sheet of paper, but we used eight different sheets of construction paper (covered later in contact paper) for a more colorful toy.
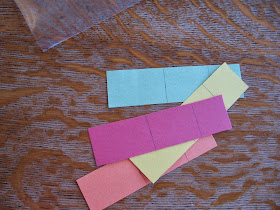
Monochrome or multicolored, you will need to cut eight strips of paper - 3cm wide, and 12 cm long.
Draw two lines on each strip to divide it into three sections - one 5 cm, one 4 cm, and one 3cm section, in that order.
If you want a more durable toy, you can cover each strip with clear contact paper, trimming it close to the paper edges, at this point. Then, fold the two end sections of each strip up, and tape them together to form a triangle.
When you have all the strips folded, and taped into triangles, arrange them into two rows of four.
Turn the triangles in each row so that the 4cm long sections are down, and the 3 cm sections are facing each other.
Join the first two, and second two triangles, in each row together, with a piece of tape across their 5cm sides.
Then join then join the sets of two triangles together with a piece of tape between the two center triangles, in each row, across their 3cm sides (only tape the two center triangles).
Place the two rows with their 4cm sides together.
Tape them together at the ends with a piece of tape joining the two last triangles of each row, across the 3 cm sides, as shown below.
Pick the triangles up to discover where they bend freely, and where they do not.
Then, beginning flipping, and flopping, and folding them into whatever interesting shape you can.


My James would love this! Thanks for posting about it.
ReplyDeleteBetter than a Rubicks Cube AND selfmade! Great idea! Have to copy again (and again, and again,...) :)
ReplyDeleteI actually like that it's somewhat easily destroyed because then I have a perfectly valid excuse for throwing away the toy when they're done playing with it.
ReplyDeleteI love that you find all these really cool activities which are so very different to each other. Your children have such a diverse education. Thanks for sharing all you do!
ReplyDeleteThis is awesome! Definitely something to try with the kids.
ReplyDeleteThank you for posting such clear directions! Doing activities like this often makes my head hurt... ;0)
ReplyDeleteThis looks like a fun way to spend some time traveling. A great idea for a traveling kit.
ReplyDelete