I was watching the children playing with the singing tubes we picked up at the grocery store, when it dawned on me...
...that if you stuffed...
...a toilet paper tube...
...rocket...
...into one end...
...and duct taped an empty 2 liter soda bottle to the other...
...you'd have a quick an easy...
...stomp rocket...
Now, maybe I'll be able to use my vacuum cleaner hose for actual vacuuming.
It's great to be a homeschooler.
Wednesday, May 30, 2012
Tuesday, May 29, 2012
Candy Mold Cookie Stamps
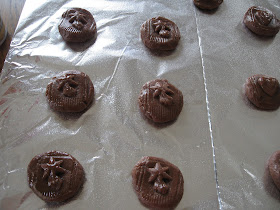
It turns out, those plastic trays from the inside of the advent calendars don't just make good candy molds...
...but passable sugar cookie stamps, as well.
It's great to be a homeschooler.
Monday, May 28, 2012
Giant Homemade Gummy Bears
If you remember, I mentioned buying a bag (or really a bucket) of gummy bears for the younger children to experiment on. It didn't come with the big guy pictured above, I made that one myself, for the children to enjoy when they were done experimenting with its smaller cousins.
With those, we performed the usual experiments - soaking them in water, and tonic water (for added fluorescence), weighing and measuring them before, and after they soaked up the liquids, to compare how much each one absorbed, and how much our control gummy bear in an empty bowl lost, during the same time period.
We checked the gummy bear soaked in tonic water under a UV light, to see if it still glowed.
And, it was about then, one of the children wondered out loud what the bloated bears would taste like.
I knew from past experience with the older children, that it was a predictable question. I also remembered the answer from the last time around - terrible, yuck, eew, really gross! That's where the big blue bear came in.
I knew seeing the big, water filled, bears would make the children want to taste them (it's only natural), but knowing they wouldn't be any good to taste, I thought wouldn't it be fun to have a big (really big) gummy bear on hand to offer them, instead?
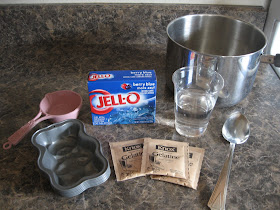
What does it take to make a really big gummy bear? Not much, other than some kind of bear mold or pan (such as the small, bear, cake pans purchased on some sale years ago, then banished to back of the pan cupboard from that day on) to pour the gummy mixture into.
The gummy mixture itself is just gelatin and water. There are a number of recipes out there for homemade gummy candies, my favorite so far has been one recommended by Not So Idle Hands. I intended to follow it this time too, but for some reason, cut the unflavored gelatin amount in half. The resulting bears were still very good, and gummy-like, so maybe this is my new favorite.
In a medium sauce pan (or ideally a double boiler), mix together:
* 1 - 6 oz package of flavored gelatin
* 3 - 1/4 oz packages of unflavored gelatin.
* and 5/6 of a cup of water.
Let the pan sit for 10 minutes, until the gelatin absorbs all the water.
Then, place the pan over medium-low heat, stirring constantly, until the gelatin melts (just until it melts - don't let it cook). Pour it into molds or pans. One batch will fill two, approximately 5''x3'' bear shaped cake pans with about a sixth of a cup left-over.
Foam will rise to the top, just skim it off as you might when making jelly. Keep it, and let it set up too. It still tastes good, just with a different texture. I skimmed the foam into the same measuring cup I had the left over gummy mixture in, and let it set up as a gummy disk (you can see the foamy part on the bottom).
Pop the pans into the fridge for five or ten minutes, until the gelatin sets up, and you will be able to pull it cleanly out of the pans.
Our bears not only tasted great, but weighed in about 45 times heavier than their average sized, store bought, cousins. The biggest bloated bear wasn't even 4 times as heavy as the original, so all in all, it was a good exchange.
It's great to be a homeschooler.
Glow-in-the-Dark "Silly" Putty - Upping the Polymer Fun
After tossing the grow-your-own-snow powder into our grocery cart, on our last shopping trip, I figured we might as well take the plunge, and pile in all the ingredients for the whole plethora of polymer experiments into the cart, too. Meaning, I grabbed a bag of gummy bears, and a box of Borax to supplement the Jell-O, cornstarch, and glue we already had waiting at home.
We've played with polymers before, but homeschooling multiple ages means repeating lessons, and experiments multiple times over the years. So, once again I covered the table in plastic, and filled cups with glue, water, and borax.
We followed Science Bob's recipe this time, which meant dissolving a teaspoon of Borax in a cup of water...
...mixing about an inch of glue in the bottom of another cup, with three tablespoons of water...
...then adding a tablespoon (or so) of the the Borax solution.
...to make slime.
Adding a second (or third) tablespoon of the Borax solution takes the mixture from slime to "silly" putty.
And, if you happen to have used glow-in-the-dark paint laden glue, instead of regular glue, to make your slimy putty...
...well, let's just say even my older "and so over slime" age children had to have some.


The paint we used in our glue was a latex based paint, which was okay for us, as we don't have any latex allergies in the house, and mixed in with the glue and borax, it didn't rub off on hands, clothing, or other surfaces. But, it did lend our slime a latexy smell, that I could have done without, no matter how cool I thought the glow-in-the dark comic prints were.
It's great to be a homeschooler.
Sunday, May 27, 2012
Science Sunday - Glowing Polymer Snow
Back at the grocery store this week, I picked up a test tube full of fake snow, and a bottle of tonic water for some Science Sunday fun.
If your grocery store doesn't happen to have vials of fake snow hanging tauntingly on the cereal aisle, don't worry, the hydrophilic powder can be found inside of diapers, as well. Professor Gizmo has a video lesson on polymers, with a child friendly explanation of the science of the stuff.
It's wonderfully absorbent, and somewhat fun to play with (though nothing like real snow).
But, what's really neat, is that if you add tonic water (which glows under a UV light thanks to the quinine it contains) instead of plain old tap water to the powder, you don't just get fake snow...
...you get glowing fake snow.
Just keep in mind, this experiment, unlike the glow-in-dark paint filled glue we made the other day, does require a UV light to make it glow. We used a Stream-Light Twin-Task 3C flashlight with a UV setting (from the Man of the House's hunting supplies). There are less expensive ultraviolet lighting options available out there, that just happens to be the one we have, and can recommend.
If you're curious about what makes the tonic water glow in the UV light, click here to read all about it.
It's great to be a homeschooler.
Linked with Science Sunday at Adventures in Mommydom.
Saturday, May 26, 2012
Marshmallow, Chocolatey, Peanut Butter Popcorn.
We are generally big fans of peanut butter popcorn as a special treat on rainy weekends, but poking around on Pinterest, or Google images, or something of the like, I discovered from Mrs. Harding of Mrs. Harding Cooks, that if you start out with a batch of popcorn...
...then switch over to Krispies mode, and melt together a bag of mini-marshmallows with a stick of butter over medium low heat...
...stir in peanut butter...
...mix it with the popcorn...
...and some chocolate chips...
I will warn you, one batch was more than enough for our family of eight to munch on, and still leave the Man of the House and I adding exercise equipment to our summer must-buy list.


