Friday, June 6, 2014

Summer Fun 2014 - Ice Castle Challenge


When I picked up our minifigure ice cube tray, I also grabbed a silicone castle mold (not an affiliate link).


After a few days of filling, freezing, and dumping out cubes, I had a large assortment of icy building blocks on hand, waiting for the perfect hot summer afternoon to present to the children with a challenge...


...to build the tallest...


...most elaborate structures possible...


...before the blocks melted...


...and all came tumbling down.


We have wooden block sets, but the melting ice blocks made for a refreshing change, as well as adding new levels of difficulty.


The Kikkerland tray was perfect for what I wanted, but not completely necessary.  A quick look around the house reveals all kinds of interesting containers for creating construction friendly blocks of ice.  In fact, I have a few such containers in my freezer right now.


Here's hoping for a nice hot weekend, and a library with at least one Leaning Tower of Pisa themed book on the shelf.

It's great to be a homeschooler.

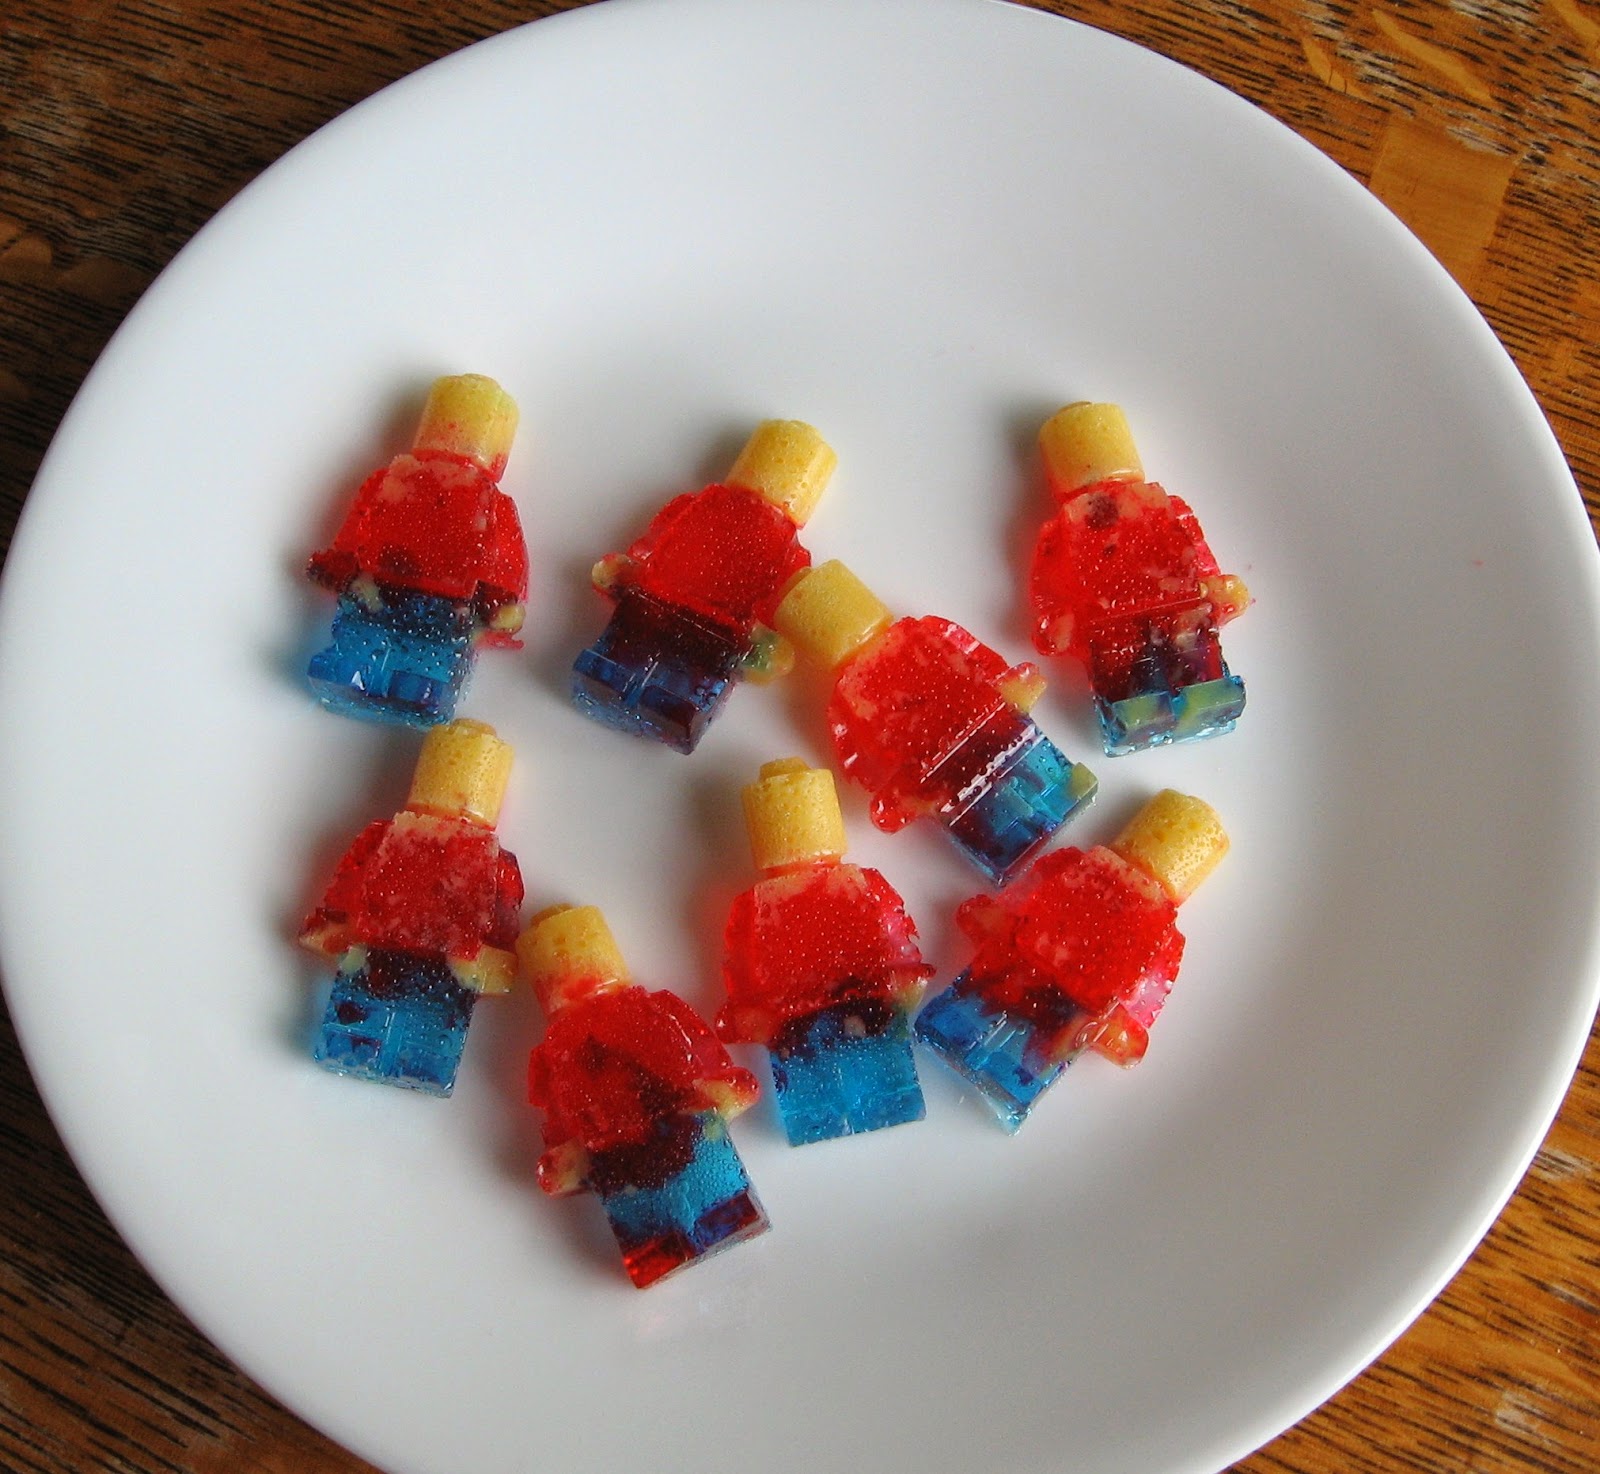
Jolly Rancher (and Life Saver) Lego Men


The children having tired of eating gummy Lego men, I decided it was time to turn up the heat, and try melting a few hard candies in the oven.


My plan was to load the mold with crunched up Jolly Ranchers in the same yellow, red, and blue pattern we had used for our gummies.  Unfortunately the package of original flavored Jolly Ranchers I'd picked up for the project didn't contain any yellow candies.  There are lemon flavored Jolly Ranchers, just not in the original flavor pack.

I had decided to use green candies for the heads (alien Lego men?), when I realized we had a couple of packs of tropical Lifesavers - which do have yellow candies...


...and just like that, we were back in business.


We placed the candies into heavy duty bags, and hammered them into pieces on a hard surface. Unlike hammering the frozen juice for our "snow cones", we punctured the bags as we hammered the candy.  

Rather than pour the candy into bowls, we just handled the punctured bags with care, and moved on - filling our mold with the candy pieces, melting them in the oven for about 5 minutes, or until the candy was completely melted, at 350°F, then allowing them to cool, and harden back down before removing them from the mold.


Our first batch of men looked a little like murder victims, as we had allowed small bits of the red candy to mix in with the yellow while we were filling the mold.


 We used a popsicle stick to keep the colors separate, starting with the yellow... 


...then tilting the stick to add the red.


The resulting men were still a little messy, but with cleaner faces.


Not that any of them lingered long enough on the plate to really be looked at.

Thursday, June 5, 2014

Summer Fun 2014 - Super Simple Yarn Pictures


Tape clear contact paper, sticky side up, over a coloring sheet.  Coloring sheets designed for color by numbers work especially well.


Give children scraps of yarn, cut into small pieces, in a variety of colors.  The amount of cut up yarn needed will vary depending on the size of the picture.  I suggest keeping it smallish, and simple.  Either way, you will need less yarn, than you might expect.


Instruct children to "color" in their pictures by pressing bits of yarn onto the sticky contact paper...


...pressing hard, and being careful...


...to fill in all the gaps.


When the pictures are well filled in, press down on the yarn one last time to secure the pieces to the contact paper.  Remove the contact paper from the coloring sheets.  Give the pictures one final shake, to remove any loose yarn.  Fill in gaps if necessary...


...and finish off by placing the yarn pictures into an open frames, if desired.


Wednesday, June 4, 2014

Summer Fun 2014 - Frozen Juice, Snow Cone in a Bag


I wanted to make some kind of icy treat for the children, mainly to keep myself from suggesting another Dairy Queen run.  I'm completely addicted to their light, piña colada, smoothies, this summer.

Mmmm...piña colada smoothies...they're so icy, and perfectly fruity.

Anyway, my first thought was to finally try freezing Capri Suns, but since we don't usually buy Capri Sun pouches, that would have meant a trip to the store, and the store is dangerously close to Dairy Queen.

I remembered having seen someone making homemade juice pouches by simply pouring juice into heavy duty, resealable, plastic bags, and decided to give that try.

We found placing the empty bags into a mug, before pouring the juice, not only keeps the bag upright, but is helpful for measuring out even, 8 oz servings.


The cup was also a convenient stand, as we pushed the air out of the bags, and sealed them up.


We placed the bags into a cake pan, to keep them orderly in the freezer...


...and froze them overnight.  Finding the frozen juice was too hard to break apart, and mush up by hand...


...I sandwiched the bags in a dish towel on top of a cutting board, and let the children crush the ice with a hammer. 


Finally, I unzipped, and rolled back the bags, stuck in spoons...


...and sent the children outside.  They were surprised, and delighted to find the resulting dessert was more like a snow cone (you can suck off the juice, and leave the plain ice behind) than a slushy.  And, I was happy to note, that while not quite the same as a light smoothie - our 8 oz bags of crushed up juice cocktail were icy, light, fruity...


...and about half the calories of my favorite Dairy Queen dessert.

Tuesday, June 3, 2014

Inspiring Summer Reading - Positive Peer Pressure Edition


Some boy (he's just a friend, Mom) from the youth group saw a picture of our cake arch on the girls' Google plus - or some such virtual friend circle, and sent them a link to a recipe for Lembas bread.  Lembas bread being the elven staple given to Sam and Frodo before their perilous journey in The Lord of the Rings.

The girls, who had never even cracked the cover of that particular book, jumped into action.

I chose not to point out that the recipe, from the Council of Elrond, looked suspiciously like a recipe for vanilla honey sugar cookies (especially, since we were out of shortening, and had to substitute in butter), or that the "bread" fresh from the oven tasted a lot like soggy graham crackers, or that printing out a mallorn leaf (from Entropy House) to copy onto construction paper...


...carefully decorated, and lined with wax paper...


...for wrapping up a piece of freshly baked Lembas bread for a special delivery to said boy at youth group that same evening, might have been a bit of overkill for a boy, whom I was being told was just a friend...


...but rather, used the opportunity to promote peer encouraged summer reading, by simply moving the book from our bookshelf to the table, where it could easily be enjoyed with a warm cookie (I can't quite bring myself to call it bread) and a glass of milk.


Okay, so I might have said all those other things, too.  But, I did produce the book, and managed not to roll my eyes, too much, in the process.


It's great to be a homeschooler.

Monday, June 2, 2014

Summer Fun 2014 - Rainy Day Bread Sculpting - Octopus Bread


Into every summer a little rain must fall.  If you live in Montana it will be a cold rain - a let's stay inside, and have bread and soup, rain.

There's nothing like the smell of baking bread to brighten up a cloudy, stuck inside day (a lesson we learned from Elisa Kleven's Sun Bread). And, since bread dough can be formed into so many entertaining, boredom busting shapes, it makes for a great rainy day activity, as well.

During our last sudden summer shower I loaded up the bread maker on the dough setting, with the necessary ingredients for a batch of white bread, and sat down with the children to search through Google images for something fun to make.  They settled on rolls, inspired by octopus bread bowls from Chew and Chew, about the time the bread maker beeped to indicate the dough was ready.


I pinched the dough into eight equal pieces, since there are eight of us, and gave them to the children to sculpt on floured pieces of wax paper, for easy clean-up.

They pinched each of the eight pieces into two equal pieces - one for the head, and one for the arms of their octopuses.  And, they divided the second piece in half, and half again, and once more in halves to make eight balls of dough...


...which they pinched, stretched, and rolled out into arms, arranging them like wheel spokes, on a greased cookie sheet, topping them with the head pieces, pinched sides down...


...into which they pressed...


...sliced olive eyes.


We covered them with clean towels, to let them rise, while the oven was preheating.  Then, we baked them at 350°F  for 25 minutes, gave them a quick coating of butter...


...and gobbled them up, while the thunder rolled, with steaming bowls of left-over spaghetti soup, just like my Dad used make.


For more rainy day, child-friendly, bread sculpting ideas, check out the links below.

Ugly Bug Breakfast Bread


Bread Dolls


Bear Buns


Turkey Bread


or Sun Bread


Sunday, June 1, 2014

Summer Fun 2014 - Water Balloon Horizontal Tether Ball


Fill a latex balloon with water - just full enough, so that it can be held from the tie without tearing in two.

Tie it by a strong string, like a shoe lace, to a horizontal post, like the top beam of a swing-set with the swings removed.

Have children stand on either side of the post, or swing-set.

One child serves the balloon, trying to throw, or bat it up and over the top of the post as many times as possible...


...while their opponent tries to bap it back, and over in the opposite direction, with both players staying on their own side of the post.


Play continues until the balloon pops, or loses all of its water through holes torn in the sides under its own weight and from being hit...


...or the string has been wrapped completely around the post in one direction.  In which case, the winner is the player who has managed to wrap the balloon around the post.  The winner gets to serve the next balloon.


You'll want to have quite a few balloons filled, and ready to go. 

Players will get wet - very wet.

Pieces from popped balloons are a choking hazard for younger children. Be sure to pick them all up, and to remove the hanging string from the post when all the fun is finished.