Friday, December 11, 2009

Marshmallow Dreidels and Chanukah Links

Thanks to a package of edible markers I picked up on a clearance sale last week, we were able to add a little learning to tonight's snack.


In honor of the start of Chanukah being tomorrow, we made marshmallow dreidels. I don't know where I originally saw the idea, but you can find versions of this snack all over the Internet.


We started by printing the Nun, Gimmel, Hay and Shin on jumbo marshmallows.

Then, we pushed pretzel sticks into the tops.


Finally, we attached Hershey Kisses to the bottoms, by wetting the marshmallows with water, to make them sticky, and then sticking them to the Kisses, so the pointy part was down.


I'm not sure if these would be acceptable Jewish fare. In fact, I saw concern expressed on some sites, as to the non-Kosher nature of the marshmallows. However, we were not pretending to be Jewish with this activity, but rather seeking to learn about the holiday.

To that end, we watched a Shalome Sesame clip on YouTube, while enjoying our snack. This particular clip, with Jeremy Miller, focuses in on the letters on the dreidel, explaining the words they stand for, and is followed by a brief cartoon history of Chanukah.

You can also find a number of interesting, and informative Chanukah videos for children at Chabad.org, as well as Chanukah crafts, activities, and explanations (including an explanation of what a dreidel is, and how to play with it).

It's great to be a homeschooler.

Homemade Red Licorice Recipe - Take 2


After 24 hours of hardening, or seasoning time, our first licorice attempt retained a taffy like texture. And, 24 hours is as long as the batch lasted. We really like taffy, and it's been quite a while, since we've been to the coast to pick up any of the salt water variety. But, as it was licorice, and not taffy we were trying for, we decided to press on with another recipe.

This time, we went for an easy, no cook, gelatin heavy recipe, that is really a combination of a number of recipes we found floating around the Internet.
We dissolved 1 package of sugar free, cherry flavored gelatin, 1 and a half packages of sugar free raspberry flavored gelatin, and two packages of unflavored gelatin in two cups of boiling water. Then, we added 2 teaspoons of anise extract.

We poured the liquid into a 9x9 cake pan, and put it into the fridge to set up.


Finally, we cut it into strips, and gave it a try.


As you might have already guessed, the resulting "candy" was more akin to a black licorice flavored Jell-O Jiggler, than to commercially produced red licorice. I would put it down as a complete flop (I'm not a huge fan of black licorice, or Jell-O jigglers), except that with all the sugar free ingredients, it's at least low calorie. And, do you remember, that scene from one of the Star Trek movies, where Data, with his new emotion chip, downs some kind of revolting drink, and then instantly asks for another? That, was kind of our response to this gummy, licorice concoction - we really hated it, but we just couldn't stop eating it!

It's great to be a homeschooler.

Thursday, December 10, 2009

Crunchy, Munchy Christmas Tree Cookies


For stART, a story and art link up at A Mommy's Adventures, today, we chose a story, that we've read several times this week - A Crunchy, Munchy Christmas Tree, by Karen Gray Ruelle.

If you're familiar with the story, you know that the perfect story stretching activity to go along with the book, would be to string popcorn, and cranberry garlands, and decorate a tree outside. But, we don't let the little ones under six have popcorn, per our pediatrician's advice, and since the two most anxious to do a project were both under six, it was back to sugar-cookies-as-art for us.


We started with plain dough, which I let the girls color green by mixing yellow, and blue food coloring (we also colored a small amount of the dough just yellow, for angel tree toppers). It was interesting to watch as the girls discovered, that different ratios of blue to yellow, would create different shades of green.


When they had the color the way they wanted it, they rolled out the dough, and


cut it into Christmas tree shapes, which they


topped with smaller angel shapes, and then


decorated with mini M&M's.


While the cookies baked, I cleaned up, and reset the table, so we could read the story again, while enjoying our own crunchy, munchy Christmas trees.


It's great to be a homeschooler.

Wednesday, December 9, 2009

Homemade Licorice Recipe - Take One

We were back in the kitchen, experimenting with more candy recipes. Our candy of choice for today was red licorice (I know, it's not very seasonally appropriate, but candy canes looked really difficult!). Just as with the tootsie rolls, gummy candy, and gumdrops, we found a number of recipes, ranging from kid friendly, and pretty simple, to candy thermometer difficult.

Usually, we start with the easiest recipe, and work our way up to the most complicated. But, this time, we decided to mix things up a little, and try to come up with our own recipe, by mixing what we thought were the best off all the ingredients together. Using the ingredient list from the back of a package of store bought licorice, we sorted through the recipes, and finally came up with this:

Homemade Red Licorice

  • 1/2 cup sugar
  • 1 and 1/2 cups light corn syrup
  • 3 tablespoons cherry extract (half cherry, and half raspberry would be better, but we only had cherry on hand)
  • 1 packaged unflavored gelatin
  • 5 or 6 drops of red food coloring
  • 1 cup all purpose flour
  • 1/2 cup corn starch
  • 3 tablespoons vegetable oil
  • a pinch of salt

Mix the flour, cornstarch, oil and salt together in a medium sized mixing bowl, and set aside.


In a medium sized sauce pan, combine the sugar and corn syrup. Bring them to a boil over medium heat, stirring constantly, until you reach the soft ball stage (240 degrees Fahrenheit) - I'm not sure we actually reached 240 degrees, because I put my candy thermometer through the dishwasher, and am a little suspicious of its readings.


Remove the sugar from the heat, and stir in the gelatin, until dissolved, and the food coloring, and then the flavoring.


Finally, stir in the flour mixture, and mix until smooth.


The mixture is quite sticky, and soft, but can be rolled out into ropes on wax paper, with the help of powdered sugar.

We twisted the ropes, and cut them into bite sized pieces.


Since, we just made these this morning, I'm not sure how they will be once they harden a bit more, but their initial texture is more like salt water taffy, than licorice. But hey, no-pull salt water taffy is pretty cool too.


It's great to be a homeschooler.

Tuesday, December 8, 2009

Solar Christmas Cookies

Encouraged by the success of our solar crayons, we decided to try a few sugar cookies in the solar oven today. We haven't had a lot of luck in the past with cookies in the solar oven, so we decided to make them really tiny, in hopes that they would bake. With the help of a pajama clad little one (it's important to get an early start when cooking with the sun), I rolled little balls of sugar cookie dough, and dipped them into Christmas sprinkles.

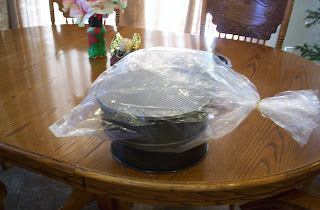
For the actual baking, we followed the same steps as for the crayons.

  • black pan


  • turkey bag


  • solar oven

I really didn't lay out much hope for the cookies, even with their reduced size, since it was -16 degrees Fahrenheit out when I put them into the cooker. And, it turned out my reservations were justified. After four hours in the cooker, the cookies were still on the doughy side, nothing a few minutes in the electric oven couldn't fix, though. So, it's melted crayons - yes, but Christmas cookies - no.

Just in case you were wondering what we wanted with a batch of miniature Christmas cookies...


...we needed them to go with a tiny cup of cocoa.


It's great to be a homeschooler.

Monday, December 7, 2009

Hand and Footprint Reindeer Craft


The theme for this weeks Unplugged Project, at Unplug Your Kids, was hand. So, the little ones, and I, put together one of our family's traditional Christmas crafts - hand and footprint reindeer. The older children seem to have outgrown the tradition, but since the two oldest now have hands, and feet bigger than mine, it's probably just as well.


We traced, and cut out two hand prints on brown paper, and one footprint on red paper, for each reindeer.


I did most of the tracing, and cutting, but the girls picked out the size of googly eyes they wanted, and the size, and color of pom pom nose. Then, they glued their hand prints to the back of the footprints, for antlers, and the eyes and noses to the front.


When the faces were dry, I added a magnetic strip to the back, for easy refrigerator display, and we were done.


It's great to be a homeschooler.

Easy Peanut Butter Christmas Mice Cookies


The look of our Christmas mice cookies, was inspired by a Taste of Home cookie, but we decided to use our own favorite, kid friendly, peanut butter cookie recipe for the base, so our mice ended up flatter than the Taste of Home originals.

I think I've posted this recipe before, but just in case:

Super Easy Peanut Butter Cookies

  • 1 cup of peanut butter (we usually use chunky, but for the mice we used creamy)
  • 1 cup of sugar
  • 1 egg

After mixing the ingredients together, we rolled them into oblong balls. For regular peanut butter cookies, the dough gets rolled into 1 inch balls, baked at 350 degrees Fahrenheit for 10 minutes, and then has a chocolate chip pushed into the middle, while still hot.


For the mice, we decorated them, most of the way, before baking. We used chocolate chip eyes, mini M&M noses, peanut halves for ears, and Christmas holly sprinkles for a little added touch of decoration.


Then, we baked the cookies for 10 minutes at 350 degrees Fahrenheit, as normal, and quickly, but gently, pressed in 2 inch pieces of licorice rope, for the tails.


The kids had a good time mixing up the dough, but found the placing of the candy eyes and noses a bit tedious. Once the mail arrived, with the latest Gamefly delivery, I was pretty much on my own. Though, I'm sure, they'll all return when it's time to eat the cookies. Hmm...I think there's a story along that line, maybe we'll read it at snack time.

It's great to be homeschooler.