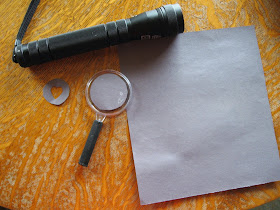
While we had our magnifying glass out yesterday, we decided to experiment with light through the lens.
Playing around, we discovered if we tilted the magnifying glass forward, and shined an LED flashlight through it, at a straight angle, we would see small rainbows around the focal point (the point where the light made a small focused dot on our paper).
It was a little hard to see on white paper, so we switched to black, and found by tilting the magnifying glass "just right" we could get a very nice rainbow arc.
We found a suggestion on Physics Forums to cover all but the outer edges of the magnifying lens with dark paper, and then to shine the light straight through (without angling the magnifying glass).
That worked too, but gave us smaller, more circular rainbows.
We also noticed that at the focal point, the light still looked the same. Even though part of the magnifying glass was covered, when we reached the focal point, we saw the same pattern of light on the paper that we had seen when the magnifying glass was not covered.
To explore this further, we cut a circle of paper to cover our flashlight lens, with a heart shape cut out of the center. Shining the light straight at the floor created a heart shaped pool of light. Shining the light straight down over the magnifying glass, aiming at the center of the dark paper on it, from a little way above it (to reach the focal length)...
...gave us the shadow of the magnifying glass with a heart in the middle, upside down from the heart on the flashlight...
...much like the upside down images we reflected (or maybe it was refracted) from outside, through the magnifying glass, onto the wall, yesterday.


a.jpg)


This is an activity I loved as a kid!
ReplyDeleteI used to play with magnifying glasses all the time as a kid.
ReplyDelete