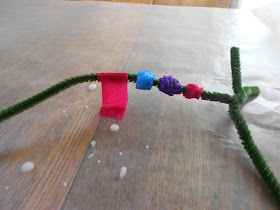
Simply add a couple of pipe cleaners, and some watered down glue (two parts school glue to one part water, works pretty well).

Cut the tissue paper into one, or two inch squares. The size doesn't matter so much, the bigger the square, the bigger the bead, but it's good to have them all basically the same size.

Twist the pipe cleaners together, near the top, to make the antennae. The butterfly design comes from David C. Cook's Children's Church, Red Edition, Craft Book, but they suggest using pony beads. We didn't have pony beads, so we proceeded to make our own, tissue paper beads by...

...folding the tissue paper squares into rectangles...

...immersing them in the watered down glue...

...then wrapping them around the pipe cleaner, and squishing them into bead shapes. This is an easy enough process for youngish children, but messy. You definitely want to cover your workspace.

It takes about 40 beads to cover the pipe cleaners.

To finish forming the butterfly, scoot the beads carefully apart, about 10 down from the top, and twist the two pipe cleaners together at the gap, into a loop, to make a sort of bow, for the top of the wings.

Then, loop the bottom ends up, to twist around the middle, making loops for the bottom of the wings.

Let the beads dry completely - it took slightly more than a day for ours to dry, and thread a piece of yarn through the wings, to hang, or use as a necklace.

It's great to be a homeschooler.
Oh, that is adorable! You are right -a day for butterflies!
ReplyDeleteSo pretty - love the results, but I wouldn't be able to stand a mess. Perhaps we will try this with pony beads instead.
ReplyDeleteFun! She looks very proud of her creation! We always seem to have scraps of tissue paper in various colors--this looks like a great way to use them up!
ReplyDeleteThat's awesome! There are times I wish my kids had patience for longer projects like that......
ReplyDeleteThat came out so pretty!
ReplyDelete