Thursday, April 30, 2015

Richardson's Ground Squirrel - Babies!!!


Our schoolwork shifted gears abruptly yesterday, when we spotted baby ground squirrels emerging from a hole in the vacant lot next to our house.  Most of our afternoon was spent observing them, and Googling a few quick facts about them to back up our observations.

We seem to have six babies.  We couldn't get too close to take pictures without Mom running in to chase all the babies back into their hole.

 
But, we enjoyed watching them through our kitchen windows, as they explored and played, on their first day above ground.


Female Richardson's ground squirrels produce one litter per year. The young, up to 8 in a litter, are born in April or May. Young ground squirrels remain underground in the burrow until they are approximately 30 days old. (from Wikipedia)


At the age of 29-30 days and weighing between 65 and 85 grams, the young first emerge from their natal burrow. They immediately begin eating solid food, soon becoming nutritionally independent of their mother. At 50 days of age, juveniles molt the baby fur and grow in their adult fur coat. (from exoticnutrition.com)

Social system:
 
  • each adult female has her own burrow system
  • each adult female rears her own litter alone and without assistance from the father(s)
  • daughters settle near their birth site; sons disperse from the birth site
  • females form matriarchal society based on maternal kinship (from research.uleth.ca)

A young / baby of a Richardson is called a 'pup, kit or kitten'. The females are called 'doe' and males 'buck'. A Richardson group is called a 'dray or scurry' (from thewebsiteofeverything.com)


By the time they emerge, the babies are nearly the size of their mother, but are much lighter in color, and extremely curious, and playful.

Wednesday, April 29, 2015

Simple Solar Thermal Projects for Kids - Expanding Air, Balloon Blow-up


While we were looking over the instructions for a solar water purifier on E is for Explore! I noticed they also had a suggestion for using solar energy to blow-up a balloon

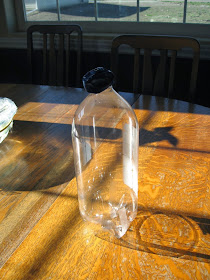
All it called for was an empty 2 liter bottle, a small balloon, and a sunny day.

We had sun, and an empty bottle (once we poured the rest of our tonic water into our "purifier").


We didn't have a small balloon, but we cut the neck off of a larger one, stretched it over the bottle, and called it good.


It's a nice, simple, quick experiment.

Put a small balloon on top of an empty 2 liter bottle, place it in the sun, and watch as the warming, expanding air fills the balloon.  The only problem we had...


...is that it didn't work.  Instead of filling with air, our balloon was being sucked back into the bottle.


The E is for Explore! experiment used one white bottle, and one black bottle for comparison.  We didn't feel like painting our bottle, but we did find a green bottle under the sink, so we pulled it out too, just to mix things up, a little...


...but the results were the same.  Outside, in the sun, the balloons were sucked back into the bottle.  When we brought them back inside - the balloons filled with air.


I asked the children what they thought was happening.  They suggested, that since we had put the balloons on bottles inside, where it was warm, and then moved them outside, where it was sunny, but cold, that the air in the bottles was cooling, and not heating.  The sun might be warming the air, but not as quickly as it was being cooled by the air outside.  Cold air takes up less space than warm air, and so the balloons were getting pulled in to fill the empty space.

Then, when we brought the bottles back inside, the air warmed and expanded, and the balloons filled.

We gave it another try - completely inside, where we could control the temperature of the room.  We took the balloon off the bottle, let the air out, and then put it back on.


Then, we placed the bottle in the sun...


...and watched as the balloon fill up before our eyes.


Success!

Tuesday, April 28, 2015

Simple Solar Thermal Projects for Kids - Solar Water Purifier


Our second, solar thermal project was to make a very simple water purifier.


This was really a follow up to our boiling tonic water "experiment".  If you recall, when we tried to make a glowing cloud-in-a-jar by using tonic water instead of water, we discovered the tonic water glowed under UV light, but the condensation "cloud" in the jar did not.  When the water turned to steam, and then condensed back into water droplets, as it reached the colder air at the top of the jar - it had left the quinine (the part of the tonic water that glows under UV light) behind.


We found instructions for a solar water purifier, using a very similar process, but powered by the sun.  Of course we had to try it.  Besides, what else were we going to do with half a bottle of left over tonic water?  Okay, I might have had a few ideas, but they can keep for another day.

We took the plunge, and pulled out two bowls, one large and one small.  We placed the small bowl into the center of the large bowl, and poured our tonic water between the two (so it was in the large bowl, but not the small one).


We covered the the large bowl, loosely, with plastic wrap, securing it in place with a stretchy hair band.


Then we placed a marble on top of the plastic, over the small bowl...


...and moved the whole thing outside into the sun.


The marble kept rolling off the bowl, thanks to a light breeze (maybe we should be studying wind power), so we replaced it with a rock.


As the sun heated the tonic water in the large bowl, it turned to steam, and condensed back into water drops when it came in contact with the plastic, where it rolled down toward the dip in the plastic created by the rock, and finally dripped down into the small bowl.

After a few hours, we had a couple of tablespoons' worth of water in the small bowl, so we brought them back inside, and separated them, drying off the outside of the small bowl...


...so we could check the water in each bowl with a UV light.  The tonic water in the large bowl glowed green, indicating the presence of quinine...


...the water in the smaller bowl did not glow green - the quinine was gone, just as we expected.  It wasn't a lot of water, but it was clean, or at least quinine free.

Questions for additional thought:
Will this type of purification remove everything harmful from contaminated water?
Would it be more efficient to purify more water (in a larger bowl) at a time, or to use several smaller bowls of water, all set in the sun at the same time?
How does the temperature of the day effect the results of the experiment?  Is it better to try this on a cold, but sunny day, or a hot, and sunny day?
What if the larger bowl was black, instead of clear?

Monday, April 27, 2015

Simple Solar Thermal Projects for Kids - Solar Updraft Tower


We're supposed to have sun for the rest of the week, but it's never good to take chances with the weather.  So, when the sun came out today, we hit the ground running with three solar thermal projects at once.

This time, instead of working with complicated, photovoltaic, solar panels, we experimented with harnessing the heat of the sun to expand air, purify water, and turn a pinwheel.  Each project was simple to put together, and provided easily observable results, but with lots of little details that could be tweaked, adjusted, or expanded.

Really I had a hard time deciding which one to write about first, finally settling on the simple solar chimney, or updraft tower we found archived on the National Research Counsel Canada website.


The chimney is made by taping together three, large, empty, clean tin cans, with the tops and bottoms removed.


A wire arch (made from an unbent paper clip) is taped across the opening of the top can...


...with a thumbtack, or straight pin, taped to the center of the arch, pointing up.


The chimney is placed on top of a couple of books, to allow air to flow in from underneath.


Finally a pinwheel - made by cutting diagonally in from the corners of a 6 inch square sheet of paper, to within a quarter inch of the center, bending the every other point from the corners to the center, and taping them in place...


...is balanced on top of the thumbtack, taped side down.


When placed in the sunlight, the heat from the sun will warm the air inside the cans, creating a convective updraft, and spinning the pinwheel.


Questions for thought:

What would happen if the tower was not on the books?
Would a paper tower work in place of cans?
Would pinwheels made of different materials, or in different sizes spin faster?
What if the tower was painted black?
Could enough power be generated by the spinning pinwheel to turn a generator?

Sunday, April 26, 2015

Cloud in a Jar - Tips and Tricks


While we're still waiting for some really good, sunny weather, to try out a couple more solar projects, I decided it might be a good time to take another look at the old "cloud in a jar" experiment. 

We've done this experiment before  - placing a pan of ice, over a jar filled with an inch of warm water, and shining a light through, to see the "cloud" forming inside  - about four years ago, with good success (click here read a more detailed account of that attempt).  At the time, we were living in a very dry climate.


Ticia, over at Adventure's in Mommydom, who lives in a very humid climate, tried the experiment recently, with her children, and it failed.

We live in slightly more humid climate now (meaning we no longer have to bathe in lotion, and towels don't always dry in the bathroom, even when they've been hanging overnight).  So, we decided to give it another try, to see if humidity makes a difference.

I'm guessing that it does, because we did have a harder time with the experiment this time around.

We tried using warm water, but the jar just steamed up, and we couldn't see a cloud. 


Then, we tried boiling water, or rather tonic water, because I was hoping we'd get a glowing cloud, under UV light (which would have been really cool).  Once again, the jar steamed up, making it impossible to see into it.  This time though, we removed the pan for long enough to wipe the condensation away from the inside of the jar, with a clean, dry towel, and continued on.

In case your wondering, don't bother with tonic water.  The water glows...


...but the cloud does not (apparently the quinine doesn't get lifted up into the steam).  Oh, and if you do decide to boil tonic water in an electric tea kettle - let it go flat, before you boil it, unless you want a fountain, that would make Mentos and Coke jealous.  It's actually pretty awesome, like putting bubble bath in a whirlpool tub (you might not want to try that one, either), but a little messy for an indoor experiment (especially if the Man of the House happens to be home at the time).

Anyway, once we had mopped up the kitchen, and wiped the condensation from the inside of the jar, we tried turning off the lights, and shining a flashlight through it. The results with a normal flashlight were less than impressive.


But, when we switched to a tactical (really bright) flashlight, we could see...


...a pretty good, swirling, whirling...


...cloud-like mist, in the beam.


So, our recommendations for creating a cloud in a jar, if you live somewhere humid, is to clear any condensation away from the inside of the jar, before looking for the cloud.  And, if after shining a light through the jar, you still don't see a cloud - try a brighter light, or perhaps, move to a darker room.

It's a neat effect when it works, and worth a little bit of fiddling.

Linked with Science Sunday at All Things Beautiful.


Friday, April 24, 2015

Solar Power on a Cloudy Day


Yet another rainy morning prompted C (age 8) to ask if we could power our solar panel with a candle.  My first reaction was to say no - it's not the right type of light, the rays, or the wavelengths, or something would be wrong.

But, of course, we tried it anyway.  And, it turns out I was wrong.


You can generate power from a solar panel, with a candle.  The light from one candle produced enough power to run our smallest hobby motor.  More candles made it run faster...


...but did not give us enough power to run our normal sized little hobby motor. 


We could also get enough power for our small motor from an LED flashlight...


...and lamp.


And again, the closer the solar panel was to the light source, the faster the motor would spin.


If I understand correctly, solar panels work when photons from the light (apparently any light, as long as it's strong enough) hit and knock electrons out of place on the semi-conductive surface (usually silicon) of the panel.  Electrons move to fill in the space, creating an electric current...


...even on a cloudy day.