Wednesday, November 30, 2011
Peppermint Dipped Marshmallows
A (age 10) created a Christmas treat, not directly mentioned in, but inspired by Emilie Barnes' The Very Best Christmas, A Season of Fun for Girls.
I didn't intend to leave the boys completely out of day three of our count down to Christmas with picture books containing recipes or crafts, but this book is just too much fun, and contains too many crafts and recipes to be left off the list.
In the book, a group of girls form a club, to share Christmas traditions, and get ready for the holiday. They meet together to make cards, advent chains, pomanders, ornaments, festive napkin rings, decorations and more, while snacking on a host of Christmas goodies (recipes included).
The older girls were immediately inspired to form a Christmas club with their own friends, and have been busy planning their first meeting - a peppermint "tea". The book has all sorts of menu and decorating suggestions for the event. The girls followed instructions for making candy-striped invitations, eyed the paper peppermint carnations, and checked to make sure we have the ingredients for Triple Chocolate Fudge Cake (basically a chocolate cake mix with chocolate pudding mix, and chocolate chips added), to be served with peppermint ice cream, and hot chocolate in place of tea.
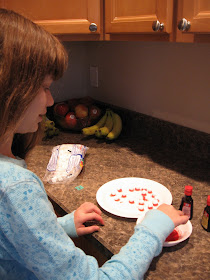
Naturally, the hot chocolate will need a peppermint touch , and marshmallows, it's just not hot chocolate without marshmallows. So, A decided to see if she could combine the two by dipping marshmallows into a shallow bowl...
...with a few drops of red food coloring, and several drops of peppermint extract (a few more than she intended, but it really pours fast).
She left them out on a plate for a few hours...
...until the food coloring was dry, but for the marshmallows were still soft (the time will vary depending on the moisture in the air).
Then, she served them up. C, and I volunteered to be guinea pigs.
The marshmallows give the hot chocolate a nice hint of peppermint, and while the red dye does seep off into the liquid, it's not enough to make a mess, as long long as you stick with four or five marshmallows per cup - more than that, and you are in danger of a red, foamy ring forming around the edges of the hot chocolate.
It's great to be a homeschooler.
Linked with Watcha Making Wednesdays at The Ramblings and Adventures of a S.A.H.M.
Tuesday, November 29, 2011
Counting Down to Christmas with Picture Books, Recipes, and Crafts - Day 2 (Cookie Store Craft)
Even though Cynthia Rylant's The Cookie-Store Cat is not specifically a Christmas story , I pulled it out for the second day of our picture book (with a craft or recipe) countdown to Christmas.
It does contain two pages right in the middle of the story describing Christmas as the best time of the year, in the Cookie shop, and many of the cookie recipes at the back of the book, such as for Gumdrop Gems, Gingerbread Men, Frosty Fruit Squares, Santa Claus Faces, and Cinnamon Sugarplums (there are seven recipes total), lend the book a decidedly Christmas feel.
The story describes the way the cookie-store cat, who was taken in by the old, kind-hearted baker as a kitten, spends his day showered in love, appreciation, and cookies (with a bowl of cream). It's a great story for children who do not like conflict, as it contains none.
The bakers love the cat. The shop keepers, up and down the street, love the cat. The customers and children, who visit the store, love the cat. And, at Christmastime the cat wears a red bow and bell, and is "so beautiful and jingles so nicely that he is the talk of the town."
After reading the story out loud, and D (age 8) exclaiming that it was the first Christmas story he'd ever heard with a happy ending (I did point out the Biblical Christmas story has a happy ending too, as long as you read all the way to the end), we were all ready to spend some time in a cookie shop, too.
To get the fun going, I traced around our Christmas cookie cutters, on the back of a flattened cereal box, and then cut the shapes out for play cookies.
The children quickly gathered, and asked for supplies - a toy oven and cash register, a cookie sheet, spatula, cooling rack, pot holders, a few paper sacks, a small paper "tip" cup...
...some extra cardboard for making a menu board and open sign...
...and crayons, for decorating the cookies. That all sounds like a lot now, writing it out, but since most of it was right there in the kitchen, it was very quick to pull together.
While the busy bakers worked in the back, D manned the cash register...
...and C prepared for the role of the customer.
It didn't take long after the store opened...
...for the busy bakers to take turns...
...as customers, as well.
While the children played, I tried out the recipe for Frosty Fruit Squares from the back of the book. It's basically a layer of jam, sandwiched between two layers of a butter, brown sugar, flour and quick oats mixture. I used our all day apple butter in place of the jam - think apple crisp in a cookie bar form - yum.
Monday, November 28, 2011
Counting Down to Christmas with Picture Books, Recipes, and Crafts - Day 1 (Cup and Ball Game)
Annette at Live, Learn, Love mentioned her family would be reading one Christmas themed children's book, each day in December, as a way to count down to Christmas.
I thought that was a terrific idea, and decided to try something similar, but with a little twist. I've spent the last week searching through the library catalogue looking for Christmas themed books with recipes, or crafts included at the back, or somewhere in the story.
I actually managed to come up with enough, if they all come in in time, to start a few days early.
Yesterday afternoon I pulled out A Pioneer Christmas by Barbara Greenwood, and supplies for making a cup and ball toy described in the book.
The book is divided into six short chapters, blending a fictional story of a pioneer family, with short non-fiction excerpts to explain life, and more specifically Christmas traditions, in the backwoods of North America, in 1841. As I said, the chapters are short, but a little wordy for younger children. Older children will have no problem reading the entire book in one setting, though.
Each chapter is followed by a craft, recipe and/or game suggestion, describing the pioneer methods, and then suggesting modern equivalents for children to use. It would be fun to read the book over the course of a week, as part of pioneer study, and work on one or two of the projects each day. The cup and ball game we chose to try is from the end of the second chapter, with an excerpt on "Pioneer Christmas Gifts".
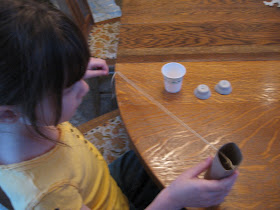
The girls weren't sure they believed we could turn a toilet paper tube, a piece of yarn, a couple of cups cut from an egg carton (our substitution for the plastic bottle caps called for in the book), a small paper cup, and some tape, into a toy...
...but they were willing to give it the benefit of the doubt, and follow the instructions. You can see the steps below, or find Greenwood's instructions in her book.
I worked with one girl at a time, so E (age 7) was already playing away, trying to catch the "ball" in the cup, while I worked with C (age 6), putting her's together. It took E a little practice...
...but she got the hang of it, much to her delight...
...and quickly drew her brother's attention, who stood impatiently watching, pleading and demanding for a turn.
Can I try?
Can I try it, once?
I want a turn!
Needless to say, he made one too.
After that, the evening passed by in a blur. Especially once the older children returned from youth group and wanted to join in the fun. Even the Man of the House and I, had a hard time resisting snatching the toys from time to time, for a turn ourselves.
We have a fair share of mechanized bling and electronic entertainment at our house, but fun is fun, and there's nothing like the simple enjoyment of a classic toy, no matter how simple or inexpensively created.
It's great to be a homeschooler.
Sunday, November 27, 2011
Christmas Traditions - Making Keepsake Ornaments
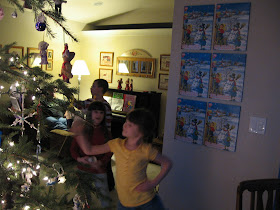
Traditionally we like to spend the weekend after Thanksgiving, picking and decorating our Christmas tree.
I lay out the children's special ornaments (they get a new one each year) in chronological order, by child. Then, I call them in one at a time to hang their ornaments on the tree, while we reminisce about the past ornaments, and the memories they represent.
I also set up a cookie decorating station, so when they were finished hanging their ornaments, each child could cut out a sugar cookie, Christmas tree to decorate with M&M ornaments.
I baked the cookies while the children were changing into jammies. Then, we enjoyed a before bed snack of cookies and hot chocolate by Christmas light, while listening to our favorite Christmas CD (Bing Crosby's White Christmas, naturally).
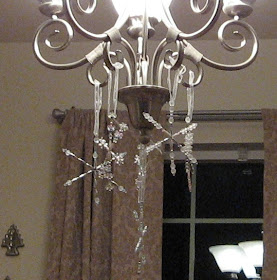
When we first started our Christmas tree tradition, it included a trip to Hallmark to purchase each child a keepsake ornament. For the last few years, I've made a surprise ornament for the children. This year, they made their own, beaded snowflake ornaments, as part of E's snow themed birthday party...
...with a Creativity for Kids craft kit, I picked up off of Amazon. The bead loaded kit was less than $20.00, and included enough supplies for making 6 ornaments, so it was perfect for us.
The children (ages 5-14) really enjoyed the activity too, and were all able to make their ornaments on their own, without help. T, objected a little, saying it was a "girl craft", but was able to put together enough sleek, silver beads for a modern, and apparently manly looking, snowflake.
The snowflakes are pretty large, but lightweight, so they don't weigh down the branches of the tree.
They also look pretty hanging, as decorations, about the house. I almost didn't want to move ours from over the dining room table, where we had placed them, after the party, to await the tree.
It's great to be a homeschooler.